DIY Freeze-Dried Backpacking Meals: Pros & Cons of Freeze-Dried Food + DIY Menu Ideas

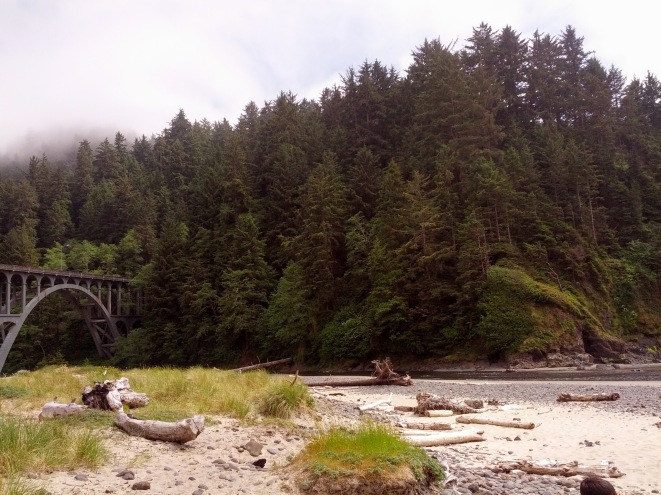
The countdown for our summer trip is on! Adding to our excitement, we recently learned that we were granted a 4-night permit to backpack 41-mile Rae Lakes Loop in Kings Canyon National Park. After visiting Sequoia/Kings Canyon and Yosemite in 2014, we’d hoped to return to explore the beauty of the High Sierra someday. We’re thrilled to finally have the opportunity to backpack both Rae Lakes and a 31-mile segment of the John Muir Trail this summer! Wilderness permits were even more competitive than I’d anticipated: with only 40 people allowed to enter the trail per day, we emailed our application in one second after the 12 am opening for permit applications for the season and didn’t receive our first choice route. It’ll mean hiking Glen Pass and Rae Lakes in a steeper counter-clockwise direction, but I have no doubt that the achy quads will be well worth the pain.

IMG_20140624_161548
Yosemite Valley, as seen from Glacier Point 2014
IMG_20140622_145012
View from atop Moro Rock, Sequoia National Park–can’t wait to explore Kings Canyon’s beautiful backcountry this summer!

With wilderness permits and campsite reservations out of the way, our focus has shifted to food. Namely, how do we plan and execute meals for a 7,000-mile road trip with 20 nights of backpacking and 20 nights of car camping? Factor in 1) flying in from Hawaii with backpacking gear and 2) renting a compact car, and the challenge becomes clear. Space and weight are at a premium, as are time and money. Throw in food preferences and dietary sensitivities, and the challenge compounds. Your food considerations may differ, and that’s okay. My intent is not to push some personal agenda, but rather to consider the factors driving our decision and share some food ideas that I hope you might find useful wherever your travels may lead you.  

Space: With backpacks holding our clothes, tents, and camping gear, any remaining items must fit into 2 carry-on suitcases when we fly. Are additional or larger suitcases options? Sure. But each additional suitcase means less space in an already compact trunk and more luggage to keep track of at the airport and on the road. In an effort to keep our packs manageable, we’ve streamlined our travel wardrobes: 3 short-sleeved tech/merino tops, 1 long-sleeved performance top, 2 pairs hiking pants, 2 pairs of sock liners, 3 pairs of socks, 1 thermal base layer set, 1 fleece pullover, 1 rain jacket, and 1 puffy per person. I realize this list may sound austere for 45 days, but handwashing clothes nightly saves us space and weight, enabling us to dedicate 2 carry-on suitcases to food…which brings us to factor #2. 

IMG_20140624_160905
The view from Glacier Point, Yosemite…this time from a slightly different angle. We’re excited to hike to Thousand Island Lake in the Ansel Adams Wilderness this year!

Whole Food/Dietary Preferences: Could we exclusively purchase fresh whole food on the road and keep everything chilled in a cooler? In theory, yes. But experience has taught us (and again, this is just us) that buying a hard-sided cooler upon arrival means spending inordinate amounts of time and money on ice maintenance. Our itinerary has us in the desert for three weeks, and keeping raw chicken and eggs cold in triple-digit heat is a tough proposition without a Yeti (it’s on our wish list, though!). Entirely possible–but not something I’m keen on focusing my energy on.

Without refrigeration, our food options are limited. There’s processed/canned food, oft vilified but not without its merits: shelf-stable, convenient, and imminently available. This is not insignificant considering that the bulk of our itinerary will take us through small towns with limited grocery availability. But while I’m not opposed to an occasional processed meal (I crave junk with the best of ‘em!), I know from experience that extended junk consumption affects my mood, performance, and morale. Similarly, our standard salami and cheese hiking fare tends to weigh me down after 2 weeks. For an extended 45-day trip, I wanted to stick closer to our everyday protein staples–nuts, beans, hummus, chicken, fish, and tofu. I also wanted to maintain our veggie and fruit intake and limit MSG and processed items.  

But how to circumvent the lack of refrigeration? DIY dehydrated meals sounded ideal, but with zero backpacking opportunities here on Oahu, the investment vs. return in terms of startup costs (dehydrator, vacuum sealer, O2 absorbers, mylar bags, etc) would leave us in the red for a few years. Freeze-dried food began to pique my interest.

PANO_20140622_144830
Moro Rock, Sequoia National Park 2014

Time and Money: For better or worse, being a compulsive itinerary-crammer means we’re often scrambling to find grocery stores and shopping under the gun in order to maximize time at destinations. And while I’ve mentioned that it’s important for us to limit expenses by cooking meals on vacation, what I didn’t mention is this: I enjoy cooking at home, but I don’t love cooking on vacation, especially after a long day of hiking. I love that other people enjoy gourmet experiences in the backcountry, but I’m not fond of fiddling with ingredients and spices on the trail. Chopping and cooking when tired is a surefire recipe for one hangry mom!

Fortunately, companies like Mountain House and Backpacker’s Pantry offer delicious freeze-dried meals with just-add-boiling-water convenience and significant time and fuel savings. They’re shelf-stable, lightweight, and compressible, making them ideal for bear canister storage as well. However, that convenience comes with a hefty price tag. At over $6 per person, I couldn’t justify the cost for 20 nights, let alone 45. I wasn’t keen on the high sodium content and additives, either. DIY freeze-dried meals started sounding like a more viable option for us.           

Backpack Space and Weight: Finally, we have several 3-5 day treks that require bear canisters (space). Given the base weight of packs and gear (20 lbs for adults, 10 for kids), we anticipate 20-35 pounds per person with food. With the kids under 90 lbs each, we wanted to keep our food as light as possible. DIY freeze-dried meals seemed to offer the best opportunity for lightweight, shelf-stable, mostly healthy food with time and money savings.

IMG_20140623_155015 (1)
We absolutely loved Yosemite Valley and can’t wait to hike a portion of the JMT near Tuolumne Meadows!

Luckily for us, there’s a wealth of DIY freeze-dried meal information to be found online! Most sites recommend assembling freeze-dried/powdered ingredients in freezer bags for ease of “cooking” (add boiling water and seal for 5-10 mins), so we’ll likely be going that route in addition to simply rehydrating meals in a communal pot.

Are there drawbacks to freeze-dried food? Absolutely. For one, freeze-dried ingredients are not readily available in retail stores. For us, this meant having to plan and order 6.5 weeks worth of food months in advance. The upside, however, is that I was able to scour Amazon and wait on the best deals. Ordering food in advance also gave me an accurate handle on our food costs–a budget area that’s generally grayer than I’d like for trips. Also, there’s no denying that freeze-drying is a type of processing in and of itself, and natural/organic options are limited. The whole grains and fiber we crave don’t always translate, either, but I’m okay with these tradeoffs. Will we still be stopping to pick up fresh fruits and veggies weekly? Definitely. Will we break down and buy a cooler at some point? Very probably. Does our menu include processed food? Some. But I feel satisfied knowing that the bulk of our food needs are covered in a way I’m mostly comfortable with.

Road Trip 2017 includes menu items like: (* indicates freeze-dried/powdered items)

  • BREAKFAST
    • Granola, blueberries, and powdered milk/soy milk*
    • Oatmeal with blueberries, walnuts, and chia seeds*
    • Scrambled eggs*
    • Tortillas with eggs, bacon and cheese*
    • KIND bars, Larabars, ProBars and the like

      IMG_20170508_100736
      A sample of our breakfast items: cheese powder, egg powder, peanut butter powder, powdered milk, freeze-dried blueberries, single-serve SPAM and Nature’s Path Oatmeal. We also ordered powdered soy milk and will buy granola once we arrive.
  • LUNCH (we prefer not to cook at lunch; when we’re not backpacking, lunch also includes whole fruit)
    • Whole wheat/spinach tortillas or bagels with pouch tuna or chicken
    • Seeded crackers with pouch tuna or chicken
    • Pita and hummus with cucumber, carrots, bell peppers
    • Whole banana rolled in PB whole wheat tortilla
    • PB with seeded crackers/pita/tortilla* and veggie sticks
    • Hummus and seeded crackers with veggie sticks
    • Bagel with pouch salmon and cream cheese
    • Pita with tomato paste, pepperoni, and cheese
    • Trail mix alone or eaten with PB, Honey Stinger waffles

      IMG_20170508_092905
      Some lunch protein options: dehydrated refried beans, peanut butter powder, shelf-stable hummus, PB/almond butter packets. We’ll pick up seeded crackers, tortillas, and tuna/chicken/pepperoni after we land
  • DINNER (based on personal taste preferences)
    • Parmesan couscous or cheesy polenta with chicken and veggies*
    • Refried beans, rice, and cheese (with/without tortillas)*
    • Angel hair pesto pasta with chicken and veggies*
    • Soba/udon noodles in miso broth with shiitake, shelf-stable tofu and wakame*
    • Mock fried rice with veggies and chicken*
    • Peanut rice noodles with chicken and veggies*
    • Jambalaya with chicken, rice, and summer sausage*
    • Curry couscous with chicken and veggies*
    • Thai/Japanese curry with shelf-stable tofu, veggies, and rice noodles*
    • Orzo n cheese with broccoli and tuna*
    • Chili chicken rice with veggies*
      IMG_20170508_100057
      A sampling of our dinner ingredients: freeze-dried chicken, freeze-dried veggies, udon noodles, natural chicken base, freeze-dried cilantro, Sriracha, soy sauce, peanut butter, non-MSG fried rice seasoning blend, tonkatsu sauce for flavor

      IMG_20170508_095123 (1)
      Also on the dinner menu are: refried beans, wakame, miso paste, and spring roll rice wrappers or rice noodles (whichever is available once we land). All starches, shelf-stable tofu, and summer sausage will also be purchased after we land

We’ll supplement daily with hardier veggies and fruits that can withstand backpack and car wear-and-tear sans refrigeration. Thankfully, carrots, sugar snap peas, celery, cucumbers, bell peppers, apples, oranges, pears, and bananas all fit the bill here. We’ll buy yogurt where available to keep our digestive tracts humming. Also, gross as it may seem, you know the menu has to include at least a little SPAM as an homage to our island roots. 😀 Fresh shrimp/sausage/corn hobo packets on market days and Idahoan Loaded Potatoes in the backcountry are also likely to make a dinner appearance or two. All things in moderation, right?

IMG_20140623_130422
We love fresh fruit on day hikes. Apples, pears, and oranges are especially hardy and do well without refrigeration. Bananas and grapes are a little more delicate but always appreciated.
IMG_20170508_092658
We stocked up on four bags each of these freeze-dried fruits and veggies as fresh produce is generally weight-prohibitive on multi-day treks. Freeze-dried produce is lightweight and fits easily into bear canisters if repackaged into Ziploc bags 

Many of our dinner recipes were inspired by freeze-dried meal recipes found on Pinterest. If you decide to go the DIY route, I highly recommend testing recipes at home first. Some ingredients and recipes took much longer to rehydrate than advertised–a definite problem at altitude with limited canister fuel. Others required flavor tweaking (again, just a matter of personal preference) or involved fiddly steps like mixing and frying dough (not my jam, but I bet a lot of people love it!). Testing recipes was also a tasty and fun solution for gauging proper portion sizes for our family. And for those who’d prefer to forgo freeze-dried ingredients altogether, substituting tuna or chicken pouches in place of freeze dried chicken is always an option, as is substituting pre-flavored sides, such as Near East Couscous, Annie’s Mac n Cheese, or Thai Kitchen noodles for any of the starches.     

My biggest food tip? Save condiment packets! They’re lightweight, easily packable, shelf-stable, and add infinite variety to your backpacking and camping meals. Here’s a short list to get you started:

Condiment Ideas:

  • Ketchup
  • Mustard
  • Relish
  • Salt and pepper (Available at diners, movie theaters, and gas station food marts)
  • Mayonnaise (Less readily available–I found these at theaters and gas station food marts)
  • Soy sauce (Chinese/Japanese takeout)
  • Hot sauce (Sriracha, Tapatio, Tabasco, etc.; I found Sriracha on Amazon, and minimus.biz is another good resource for condiments)
  • Taco sauce (think Taco Bell or Jack in the Box)
  • Salsa (sometimes served with breakfast burritos)
  • Tonkatsu sauce (sometimes available in Japanese bento)
  • Jam/jelly (many diners carry these; my sister found them consistently at Denny’s)
  • Honey (this one’s harder to find in packet form except for places like KFC or Popeye’s, but it’s readily available in organic straws off Amazon)
  • Sweet and sour sauce/ BBQ sauce/Ranch/Honey Mustard/Sweet Chili containers (this one’s pretty specific to McDonald’s and other fast food places that serve chicken nuggets)
  • Olive Oil (I ordered these off Amazon to boost calories as needed)
  • Syrup (fast food breakfast chains are your best bet)
  • Red pepper packets/parmesan cheese (pizza/Italian takeout)
  • Hot mustard (Chinese takeout; Panda Express has a lot of these)
  • Wasabi (from sushi or poke takeout)

    IMG_20170508_094256
    Small sample of seasonings and condiments: non-MSG dashi powder, Creole seasoning, natural chicken base, tomato powder, freeze-dried cilantro, Sriracha, hot mustard, yellow mustard, jelly, ketchup, relish, soy sauce, mayo, and taco sauce. 

With the help of family and friends, we’ve been lucky to amass a nice condiment haul over the last few months. Fortunately, freeze dried food compacts well, leaving plenty of space for condiments in our 2 carry-ons. And anything that helps us stay on track for cooking our own meals helps to save time and money in the long run. For example, even though we’re fried rice fanatics, the mock fried rice we tested left us less than wowed. We found ourselves craving the oyster sauce umami punch that soy sauce alone lacks. Down the line, this might lead to abandoning the meal altogether for costlier restaurant fare or processed items. Adding hot mustard and soy sauce to the mix, however, instantly made the rice more interesting. And a packet of sriracha changed the flavor profile completely! With a few condiment packets and a little imagination, it’s possible to elevate any meal from ho-hum to crave-worthy. So, save those condiment packets–they definitely come in handy!
Do you have a favorite camping or backpacking meal? I’m always looking for new food ideas…I’d love to hear about your favorite food strategies and tips for camping and/or road trips!

More Than Meets the Eye: Wind Cave National Park and Mount Rushmore National Memorial

Prior to 2015, my impression of South Dakota was informed largely by bits and pieces I’d gleaned from the Travel Channel and a well-meaning Nebraskan friend. Corn, windmills, and biker rallies figured pretty prominently into the picture, as did tractors on highways and grasslands on steroids. Let me amend that: only grasslands on steroids. To hear my Nebraskan friend tell it, South Dakota comprised nothing more than 75,000 square miles of telephone poles and the very occasional crow.

“You’ve read Little House on the Prairie, right?” she said. I nodded, and she tossed her hands up in a you see what I mean? gesture. I thought she might at least concede Mount Rushmore as a worthy stop, but I quickly learned my lesson: South Dakota/Nebraska rivalry is a glorious, deep-seeded thing. Planning three days in South Dakota could only be perceived as a personal affront. “Have fun watching grass grow,” she huffed.

Here’s what I didn’t dare tell her: we could’ve spent three weeks in South Dakota and only scratched the surface of all that this beautiful state has to offer.

From Rocky Mountain National Park, we headed north, spending a day in Badlands National Park before bearing west towards Wind Cave National Park and Mount Rushmore National Monument. Already, we were enamored of the otherworldly terrain and wildlife of the Badlands, but before our three days were through, we’d come to love so much more about this underrated state. We were fortunate to stay at the Mount Rushmore KOA at Palmer Gulch, just ten minutes away from Mount Rushmore. We love in-park camping and had planned a week’s worth between Grand Teton and Yellowstone in the coming week, but I’m not ashamed to admit that I love a good KOA almost as much as the kids do. It’s the perfect camp/resort hybrid, and at $20/night for a tent-only site plus a $10 resort fee, this KOA measured head and shoulders above any commercial campground we’ve ever stayed at. But more on that later.

IMG_20150630_192708
Our home for two nights–Mount Rushmore KOA at Palmer Gulch was one of our favorite KOAs ever!

Palmer Gulch turned out to be a convenient home base for exploring Wind Cave National Park, a short 40-minute drive away. Wind Cave doesn’t receive nearly the attention that Carlsbad Caverns or Mammoth Caves does, and that’s a shame–it’s a fascinating place to visit. On first glance, it’s easy to dismiss Wind Cave as yet another example of the ubiquitous South Dakota grasslands my friend had warned us about, but this prairie harbors a secret world. Beneath the bison herds and prairie dogs peeking out from park burrows lies a 140-mile labyrinth of passageways that makes Wind Cave the sixth longest cave in the world. More significantly, Wind Cave houses 95% of the world’s known boxwork formations–thin calcite projections that form honeycomb patterns. 95%! True, I’d never heard of boxwork formations before visiting Wind Cave, but still. I know a significant thing when I hear it. 😀 

IMG_20150701_083721
Wind Cave National Park, 2015

Visitors may only enter the cave through a guided ranger tour, so we stopped at the Visitor Center to purchase tour tickets and Junior Ranger booklets. We opted for the 1.5 hour Fairgrounds Tour, which would allow us to explore both the upper and middle levels of the cave. NPS labels this tour as its most strenuous walking tour, but don’t let that deter you–participants navigate 450 stairs over two thirds of a mile in dimly lit conditions, but aside from the darkness, this tour is entirely doable for kids and adults of all ages. At $12 per adult and $6 per kid, the tour was reasonably priced, and we were excited to see what Wind Cave held in store for us.

A short elevator ride transported us from the Visitor Center into a dark and complicated maze of cave passageways. Outside, it was a blistering 100 degrees; here, beneath the surface, it was a cool 50–chilly enough to warrant a jacket. Moving from room to room, our ranger pointed out elaborate boxwork formations and illuminated iridescent frost formations with a flashlight. She warned us not to dawdle, and it soon became clear why: passageways forked into multiple passageways, which in turn divided into multiple passageways yet again–a mitotic explosion of cave confusion to the uninitiated like us. We ducked low boxwork ceilings in rooms barely large enough to accommodate a single body, only to turn the corner to enter gaping caverns where our voices echoed for what seemed like miles. It was an amazing study in contrasts. Our ranger ended the tour by extinguishing her flashlight to let us experience absolute darkness–the kind of darkness that made it impossible to see our outstretched hands not six inches from our faces. It was an incredible experience.

IMG_20150701_102423 (1)
Descending into the depths, Wind Cave Fairgrounds Tour
IMG_20150701_100444
Low boxwork ceilings meant frequent ducking and stooping
IMG_20150701_100512
Intricate boxwork in Wind Cave
IMG_20150701_110758
Maneuvering between narrow walls, glancing up at intricate formations
IMG_20150701_100504
Boxwork ceilings, iridescent frost formations as well
IMG_20150701_104520
Fairgrounds Cave Tour contains over 450 stairs, but it’s very manageable for families. Nothing sketchy or overly strenuous.

We ended our time in-park with a cursory nod to Wind Cave’s above-ground offerings, hiking 1-mile Prairie Vista Trail. Rolling plains, wallowing bison, and skittish prairie dogs set the stage for a hot but easy stroll through a sampling of the park’s bucolic setting. I would’ve loved to spend the rest of the day exploring Wind Cave’s hiking trails, but there was a KOA with resort amenities calling to the kids like Siren song. They’re good sports, always indulging my hiking and backpacking whims without complaint, so how could I begrudge them an afternoon of kid-approved fun? We drove back to our campsite and unleashed their boundless energy on Palmer Gulch.

IMG_20150630_145838
Prairie Vista Trail

Talk about amenities–this KOA was seriously decked out! Water slides, swimming pools, climbing walls, and a giant jumping pillow would’ve been ridiculous enough. But throw in a foam pools, life-sized chess, hayrides, horse rides, and bicycle rides, and you begin to understand why the kids couldn’t tear themselves away. They played hard all afternoon, finally collapsing at camp five hours later for dinner. We cooked our own meals, but this KOA even offers a pizza parlor, nightly barbecue buffet, and an ice cream shop for those who’d prefer to let someone else do the heavy lifting. For $20 a night, I can’t recommend Mount Rushmore KOA highly enough!

IMG_20150701_134652
Catching air–the kids loved this jump pillow!
IMG_20150701_141708
With all the activities that the KOA had to offer, it was a happy surprise to see them enjoying basketball together
IMG_20150701_143100
Our youngest had the best time riding around camp
IMG_20150701_155837
Slippery, soapy, foamy fun. Our youngest made fast friends with this little guy.
IMG_20150630_203553_1
Water slides, pools, and sprinklers provided relief from the triple digit heat
IMG_20150630_192731
Mini playground just feet from our campsite. The kids played here before every meal. The main amenities area had a much larger playground with sprinklers and a climbing wall.
IMG_20150630_192646 (1)
Hearty dinner for the famished fam

After dinner, we drove to Mount Rushmore National Memorial. If we had any question about the kind of crowds this great American icon draws, we had only to survey the enormous size of the parking lot–far and away the largest of any NPS site we’ve ever visited–to know the answer. This is not the kind of monument that’s hidden behind some grand facade, either; it doesn’t require hours of hiking to get to. In fact, from the moment you step onto the grounds (and for many miles before), you can see Mount Rushmore. But the experience of visiting Mount Rushmore? So much more than that. Walking through the parade of flags, watching the presidents’ faces sharpen in focus with each passing step–it’s an intentional process that transforms and elevates the experience into something unforgettable.

IMG_20150701_200450
Entering Mount Rushmore National Memorial–turnstiles
IMG_20150701_201026
Parade of flags–each state is represented here
IMG_20150701_200934
Mount Rushmore crowds are huge, especially in the summer. I never thought I’d love a crowd, but it really added to the patriotic swell of the lighting ceremony.
IMG_20150701_201122
A little piece of Hawaii in South Dakota
IMG_20150701_201322
Mount Rushmore at sunset, June 2015
IMG_20150701_201232
Sunset over Mount Rushmore. You can probably tell from all the gray–we got caught in some crazy thunder and lightning on the way back to camp!

Although we didn’t have enough time to hike any of the trails that would have brought us to the base of the carvings, we enjoyed browsing museum exhibits that cataloged the arduous task of bringing Mount Rushmore into fruition. Given a second chance, I’d definitely allot an entire day here, but if 2015 turns out to be my only experience at Mount Rushmore, I’m extremely grateful to have experienced the park’s evening program. Like everything else about South Dakota, the evening lighting ceremony was so much more than I expected. The sun set over the amphitheater, crowning the monument with a brilliant halo and then darkness. Floodlights illuminated the stage, drawing our attention away from the darkening monument. Through film, the ranger explained the significance of the presidents honored by Mount Rushmore. She asked us to consider the symbolic light of freedom and its importance not just to Americans, but to all those fighting oppression worldwide as Mount Rushmore came aglow. By the time the audience joined her in the Pledge of Allegiance and “The Star Spangled Banner,” I was choking back tears. The ranger called those who’ve served to the stage, asking each serviceman and servicewoman to introduce themselves and their branch of service. I was beside myself. The crowd’s deafening cheers, the rousing ovation for the men and women who defend our freedom–it was a swell of patriotism and pride I’ll never forget.

IMG_20150701_210043
Evening lighting ceremony. As the sky darkens, the amphitheater stage comes to life
IMG_20150701_212932
Symbolic light of freedom, Mount Rushmore National Memorial. If you visit Mount Rushmore during the summer, I highly recommend attending this ceremony!
IMG_20150701_212948
The park ranger called servicemen and women to the stage. So incredibly moving.
IMG_20150701_213018
Reciting the Pledge of Allegiance and singing “The Star Spangled Banner” during the evening lighting ceremony

Since 2015, we’ve compiled a growing list of places we’d like to explore in South Dakota, among them Custer State Park, Crazy Horse Memorial, and Jewel Cave National Monument. My friend will roll her eyes when I tell her our plans, no doubt. Is South Dakota all grasslands on steroids? Absolutely–and not at all. Amid all that grass, there is so much more than meets the eye, and I, for one, am thankful that my friend is a very good sport because goodness knows, I am a very bad listener.     

Rocky Mountain National Park: 5 Family-Friendly Hikes

In our family, life in the seventies unfolded to a revolving soundtrack of the Carpenters, Barry Manilow, and Neil Diamond. Some of my earliest memories are of my mom setting the record player needle onto vinyl just so, my dad singing and stomping to “Sweet Caroline.” I’d spend whole afternoons rifling through our album collection, pulling records from sleeves to hand to my mom. I remember one album in particular–a bespectacled, long-haired John Denver on the cover, guitar in hand–a greatest hits compilation. I may not have understood who Annie was or the significance of those country roads, but there was an earnestness to Denver’s voice that moved me even then. Listening to “Rocky Mountain High” with the kids decades later at Rocky Mountain National Park was like traveling back in time, linking past and present. Like coming full circle and going home. Wandering a few miles of RMNP’s trails, those lyrics came alive like never before. Hiking felt like catching a small glimpse of Denver’s heart.              

  1. Bear Lake Loop (0.8 miles)

If you’ve ever visited Bear Lake in late June, then you already know the truth we discovered on Day 3 of Road Trip 2015: the eponymous bear of Bear Lake might have more to do with the challenging parking conditions than any creature of the ursine variety! Still, one glimpse of beautiful Bear Lake was all it took to convince us that parking woes were a small price to pay for such beauty. We jockeyed for a stall at the Bear Lake Park and Ride (our fault for lingering over camp bacon!) and took a free park shuttle to the lake.

With a bevy of lovely trails and showstopping subalpine scenery to enjoy, Bear Lake is one of the most popular regions in RMNP. Crowds are something I prefer to avoid, but Bear Lake is popular for a reason: if ever there was a picture perfect postcard scene, Bear Lake is surely it. Bear Lake Loop follows the circumference of Bear Lake, offering multiple perspectives and viewing angles with an added benefit–the farther we hiked along the loop, the more the crowds diminished. And while you’re never truly alone on this trail, there are plenty of lakeside pockets and clearings to escape to, if only for a minute.

IMG_20150627_110440
Bear Lake Park and Ride–even with several hundred stalls, this lot fills by 9 am
IMG_20150627_110842
Bear Lake, RMNP
IMG_20150627_110935
Bear Lake Loop, 2015
IMG_20150627_111352
Bear Lake Loop offers pockets of solitude not generally found at the trailhead
  1. Nymph Lake, Dream Lake, and Emerald Lake (3.6 miles)

Once back at Bear Lake trailhead, we followed an adjacent trail to Nymph Lake, half a mile away. A short but steady uphill climb didn’t sound so bad on paper, but the unfamiliar altitude (9,400 feet) left us winded. Coming from sea level, we found ourselves headachey and nauseous. Recognizing the effects of altitude, we slowed our pace and hydrated liberally to take the edge off. (Which mostly worked, though we continued to experience headaches the next day, too.) We rested at Nymph Lake for half an hour, journaling and sketching the waterlily-ringed lake before us. While not as clear or vivid as Bear Lake, Nymph Lake had its own Monet-like appeal that made for an interesting watercolor study.

IMG_20150627_114853
Taking a break to sketch the scene with watercolors
IMG_20150627_115632
Nymph Lake, RMNP 2015
IMG_20150627_121344
Photo cred to the hubby for this shot…and most of the shots on this blog, really! 😀

From Nymph Lake, we climbed another half mile to an elevation just shy of 10,000 feet. This portion of the trail remains ingrained in my mind to this day: yellow wildflowers overlooking miles of forest, Longs Peak standing watch in the distance. It was hard to keep from stopping every few seconds; it seemed there was a rushing creek or family of deer vying for our attention around every bend. Perhaps that’s how it was meant to be–RMNP’s way of upping the ante to prepare us for the grandeur of Dream Lake. Framed by snow-capped Hallett Peak, Flattop Mountain and Tyndall Glacier, Dream Lake remains one of the most spectacular sights I’ve ever seen. We lingered on a rocky perch and sketched for the better part of an hour, savoring the view.

IMG_20150627_125457
On the way to Dream Lake, Longs Peak in the distance
IMG_20150627_125515
Between Nymph Lake and Dream Lake
IMG_20150627_130559 (1)
This portion of the trail was especially scenic
IMG_20150627_130126
We felt like we were getting whiplash–there were beautiful creeks around every bend
IMG_20150627_131007 (1)
Dream Lake was sublime, especially as seen from our rocky perch away from the crowds
IMG_20150627_130935
Dream Lake, RMNP–we sat here for close to an hour just absorbing this beautiful scene

Though we were loath to leave Dream Lake, we still had a mile to go to reach our final destination: Emerald Lake. Climbing through the heart of Tyndall Gorge, we were excited to come upon a family of elk grazing in a meadow. They paid us no heed as we ascended the trail, finally coming to a rocky outcropping signalling the end of the trail and the beginning of Emerald Lake. I wasn’t sure anything could top the magnificence of Dream Lake, but Emerald Lake gave Dream a run for its money with its exquisite jewel-toned hue. We’re lake fans through and through, and this hike came through in a big way, supplying four beautiful subalpine lakes in under four miles. Emerald Lake even delivered an entertaining bonus in the form of a plump marmot who scurried about the rocks, panhandling for food.

IMG_20150627_135336
Between Dream Lake and Emerald Lake; loved seeing the mountains and lakes from multiple angles
IMG_20150627_141942
Emerald Lake, RMNP–it was challenging to take a photo without being unintentionally photobombed by lakeside visitors
IMG_20150627_141723
Emerald Lake (plus unintentional photobombing visitor) 😀
IMG_20150627_141957 (1)
Loved Emerald Lake’s beautiful jewel-toned hue
  1. Alpine Ridge Trail (0.6 miles)

Day 2 in RMNP dawned ominous and gray. A quick check-in with a park ranger regarding impending thunderstorms confirmed our hunch that hiking 5 miles along open and exposed Mount Ida Trail was probably not the best idea. His recommendation? Hike the half mile trail behind Alpine Visitor Center instead. I have to admit that I secretly pooh-poohed the idea– “Only half a mile?” I thought–but don’t let Alpine Ridge Trail’s short length fool you: ascending 200 feet at an elevation of 12,000 feet in under three tenths of a mile is no joke. Our youngest was seven at the time and had to sit with his head between his knees a long while to recover. He struggled to catch his breath, saying it felt like there was an elephant sitting on his chest.

Here in the alpine tundra, the growing season is short. Wildflowers bloom for six short weeks and plants grow low to the ground, adapting to the harsh winds and temperature extremes of this unforgiving environment. These miniature blooms have found a way to thrive where other organisms perish, and it was a treat to see their vibrant hues dotted against the stark expanse of glaciated greens and purples.

IMG_20150628_092526
Alpine Ridge Trail begins behind this Visitor Center
IMG_20150628_094158
Climbing toward the sun (or thunder clouds)
IMG_20150628_095224
Interpretive signs help with identifying all the different wildflower species
IMG_20150628_094119
Looking back at the Visitor Center
IMG_20150628_100849
Adventures of Five at 12,005 feet!
IMG_20150628_100947
At the top of Trail Ridge Road, fourteeners look like tiny hills
  1. Tundra Communities Trail (1.1 miles)

Located a few miles from the Alpine Visitor Center along Trail Ridge Road, the Tundra Communities Trail traverses alpine tundra and offers tremendous Alpine Ridge Trail views with far fewer crowds. I wish we’d taken pictures of this trail, but we were too busy keeping an eye on the thunderstorm headed our way…and driving ourselves crazy trying to locate the elusive pikas that had us turning circles with their distinctive chirps! We could’ve sworn we heard thousands of them, but spotting these little critters would elude us until Grand Teton National Park a week from now. Still, we loved hiking above the treeline through tundra meadow and especially enjoyed the strange and wonderful mushroom rock formations along the way. Tundra Communities Trail makes for fantastic and worthwhile tundra exploration along Trail Ridge Road.

  1. Hidden Valley Trail (<2 miles)

With thunder clouds rolling in, we were anxious to descend Trail Ridge Road but couldn’t bring ourselves to leave RMNP just yet. As luck would have it, RMNP’s Junior Ranger Headquarters is located at the base of Trail Ridge Road alongside a picturesque picnic area and valley creek. With a pot of lentil soup warming our bellies, we set out to explore Hidden Valley. A short boardwalk looped around the picnic area, branching off into spur trails that led into the mountains. We followed the most obvious of these trails and found ourselves quickly gaining elevation–and just as quickly losing traction along the steep incline. We later learned that this area is an old ski area used for winter tubing, which sounds just about right given the slopes we encountered. Downed trees littered much of the trail ahead of us, so we decided to turn around before things turned sketchy. To be honest, I’m not even sure of the trail’s official name, but exploring Hidden Valley reinforced the old adage that it really is the journey that matters most.

IMG_20150628_134221
Main loop around picnic area
IMG_20150628_141849
So many wildflowers in Hidden Valley
IMG_20150628_133343
Creek view, Hidden Valley
IMG_20150628_134205
The yellow wildflowers were especially pretty here
IMG_20150628_141743
Hamming it up in Hidden Valley

Back at Jellystone of Estes Park, we’d barely finished 4 holes of miniature golf before thunder crashed across the Rockies, splitting the sky apart in a torrent of rain. I’d used the phrase “lightning bolt” before but had never actually witnessed one until that moment. Watching lightning zig-zag across the sky and strike the ground with an electrifying crackle was a terrifying and awesome thing. The boom of thunder echoing across the Rockies is something I’ll never forget. Safe and sound in our tent, we were so glad we’d heeded the ranger’s advice about Mount Ida!

A short aside about Jellystone of Estes: Though the staff was very welcoming and kind and the kids loved the Yogi Bear Mardi Gras parade, given the price of a tent-only site ($60 per weekend night) and lack of amenities such as a hot tub or pool, we probably wouldn’t stay here again. We’re happy to have tried it and enjoyed our stay, but we’d prefer to camp in RMNP next time.

As always, our time in RMNP was over too soon, but we were grateful to have sampled the sights and serenity that make this park so unique. Heading out of RMNP for South Dakota, we couldn’t help but smile at John Denver’s fitting send-off refrain. 

And the Colorado Rocky Mountain High, I’ve seen it raining fire in the sky.

You can talk to God and listen to the casual reply.

Rocky Mountain High, Colorado.

Also from Road Trip 2015: RMNP Trail Ridge RoadGrand Teton Day 1, Grand Teton Day 2, Badlands National ParkPANO_20150628_101243

Dinosaur National Monument + Rocky Mountain National Park: Trail Ridge Road

Let me come right out and say it: Dinosaur National Monument was not a destination high on our travel list. Like Mesa Verde, it was an afterthought of the we’re passing through, so why not? variety. Honestly? My expectations were embarrassingly low.

Oh, we of little faith! Because National Monument and Park status is not something so glibly conferred. Still, it took a Dinosaur National Monument visit to eradicate my heretical leanings once and for all. Spoiler alert: this unassuming park delivered in big and unexpected ways!

Salt Lake City

Summer 2015 began with a six-hour red-eye to Salt Lake City that sounded good in theory–cheap tickets with an early-morning arrival, allowing for a full day of SLC exploration. Turns out a 3 am (Hawaii time) touchdown makes for some very grouchy kids–and testy parents. Oops! Oh well, at least we got the cheap tickets part right. Luckily, the kids caught their second wind at Park Cafe. Trip Advisor nailed this SLC breakfast recommendation right: thick-cut slab bacon, in-house strawberry jam, and homemade hash that delivered beautifully in the surface area to crisp edges ratio department. Bountiful portions kept our hungry brood plenty satisfied.

From Park Cafe, we headed to Temple Square for a glimpse into the heart and history of the LDS organization. Regardless of religious affiliation, Temple Square represents a triumph of both architecture and the human spirit. It is easy to appreciate the immaculate grounds and reverent beauty found here. We spent the better part of the afternoon wandering Salt Lake Temple, the Family History Library, and LDS Conference Center. The Tabernacle, in particular, harkened back to childhood memories of watching the Mormon Tabernacle Choir perform around an old rotary-knobbed Magnavox on Christmas Eve (Whew, dating myself big time here. Anyone else remember standing up to change the TV dial? Bueller?).

IMG_20150625_133905
Afternoon walking tour through SLC

Melt-in-your-mouth pastrami burgers and creamy fry-dipping sauce from Crown Burgers made for a tasty early evening pick-me-up before a 3-hour drive east to Vernal. If you like pastrami, you’ll love this SLC institution! Vernal is a fun little town–a quirky, kitschy mishmash of dinosaur-themed memorabilia and potted flower-lined streets. Even the gas stations sport fun dinosaur statues. With two weeks of camping ahead of us, we happily splurged on a motel and settled in for the night.

IMG_20150625_140726
Crown Burgers with special fry sauce (It’s probably just mayo and ketchup, but I swear the stuff is like crack with that pastrami burger!)

Dinosaur National Monument

Dinosaur National Monument straddles the border of Utah and Colorado, sheltering a dinosaur fossil hotbed in Vernal and winding through dramatic canyon country in Colorado. Both regions are stunning. Unfortunately, we only had time for half a day in Vernal but earmarked both ends of the park for a return visit.

A quick stop at the Quarry Visitor Center gave us time to view the park film, pick up Junior Ranger booklets, and hop on the summer shuttle to Quarry Exhibit Hall a quarter mile away. Recently renovated, the Quarry Exhibit Hall was truly magnificent! The structure itself contains glass-paneled walls that allow you to see for miles into the quarry, but what is even more impressive is the fact that the building houses over 1,500 dinosaur fossils in relief. In the early 1900s, paleontologist Eric Douglass envisioned housing the exposed bones in relief, suggesting that such a site would inspire more awe than excavating the fossils. He couldn’t have been more right. With skeletons left untouched and exactly as they’d been discovered over a hundred years ago, we felt like paleontologists discovering this quarry for the first time. True, we were a small and biased sample, but the wonder and awe we felt walking through the display seemed to confirm Douglass’ vision. This was not some hodgepodge of bones, either; we were able to make out entire articulated vertebral columns, skulls, and Stegosaurus plates. We purchased a one-dollar guide that was invaluable in helping us identify the fossils and decipher what we were seeing; between the guide and the quarry, our youngest was in dinosaur heaven.

IMG_20150626_091719
Dinosaur National Monument, Utah 2015
IMG_20150626_094357
Riding the shuttle tram from Quarry Visitor Center in Vernal
IMG_20150626_095109
Quarry Exhibit Hall
IMG_20150626_100116
Quarry Exhibit Hall houses skeletons in relief
IMG_20150626_095653
Vertebrae in relief
IMG_20150626_095317
Comparing fossils against our reference guide

The Quarry Exhibit Hall also houses many reassembled fossil skeletons, among them a Camarasaurus discovered in Dinosaur. An interactive Junior Ranger Talk gave the kids an opportunity to touch dinosaur bones, test their knowledge of Jurassic trivia, and emulate dinosaur gaseous emissions with balloons–a hilarious activity that proved you’re never too old to find balloon flatulence amusing. 😀

IMG_20150626_100339
Dinosaur National Monument
IMG_20150626_101547 (1)
After striking out on fossils at California Academy of Science, he was so happy to see assembled dinosaur skeletons here
IMG_20150626_101333
Informing the vision behind Quarry Exhibit Hall
IMG_20150626_105010
Blowing balloons to emulate dinosaur flatulence
IMG_20150626_105037
Flatulent balloons never get old

In a state that boasts the Mighty Five, it’s easy to see how a park like Dinosaur might get overlooked for top billing. But perhaps it’s precisely Dinosaur’s quieter nature that makes it feel like such a find. We only had time to hike 1.2-mile Fossil Discovery Trail before our shuttle arrived, which is a shame because Dinosaur National Monument looks to have some incredible trails. We’d love to tackle more hikes as well as camp or river raft through the park someday. Kids or no, I suspect we all harbor some secret seven-year-old dinosaur zealot deep within. Call me corny, but there’s something nostalgic about reigniting that dormant zest at Dinosaur National Monument.

Rocky Mountain National Park: Grand Lake to Estes Park via Trail Ridge Road

From Quarry Visitor Center, we drove four hours east to Kawuneeche Visitor Center in Grand Lake, Rocky Mountain National Park. Coming from triple digit temps in Dinosaur, we found ourselves reaching for jackets to stave off the cold in Grand Lake. With a quick stop to view the park film, admire elk, and play with roadside snow, we ascended Trail Ridge Road.

Trail Ridge Road is a spectacular 48-mile stretch of highway spanning the heart of Rocky Mountain National Park and linking Grand Lake in the west with Estes Park in the east. Crossing the Continental Divide, Trail Ridge Road traverses alpine tundra at dizzying elevations of over 12,000 feet. The drive begins like any other in the Rockies–evergreens and forest views–but within minutes, Trail Ridge Road redefines itself as something else entirely. Pine forests yield to wind-sheared firs and then barren sky as you climb above the clouds–a literal expression, not a figurative one. Here in the vast alpine tundra, clouds mist across the road, cloaking snowy peaks below. Devoid of trees, the Rockies seem to go on forever, just one immense fourteen-footer after another. It is impossible not to be moved by the enormity of it all.

Spotting a herd of elk grazing amid the clouds, we felt certain we were at the top of the world. It wouldn’t have been such a stretch given the rising altitude and thinning oxygen. Where else but at the top of the world could you find startlingly stark beauty like this?

IMG_20150626_174048 (1)
The ascent…climbing into the clouds
IMG_20150626_173502
The views keep getting better and better
IMG_20150626_173835
From up in the clouds, those 14-ers look like little hills
IMG_20150626_174806
Turning a curve to see this herd in the clouds was amazing
IMG_20150626_174822 (1)
We sat here for quite a while admiring these beautiful elk
IMG_20150626_175156
Trail Ridge Road, 2015

With daylight fleeting, we were disappointed to make a hasty descent to Estes Park and Jellystone Campground, our home for two nights. With the beauty of Trail Ridge Road still fresh in our minds, we were excited to see what Rocky Mountain National Park held in store for us at Emerald Lake and Mount Ida the next day. For now, though, it was on to more pressing matters, like dinner and s’mores and the adorable bunny who so graciously allowed us to share his charming home.

IMG_20150626_200407
The adorable bunny who shared his campsite with us for two days, Jellystone Estes Park


3 Days in Arches: 7 Family-Friendly Hikes + Whitewater Rafting Fisher Towers, Part II

“It’s a high water year, folks. You’re in for a treat,” our guide assured us with a grin.

Gangly and angular, our guide’s arms hung disproportionately long in a way that no respectable non-teen’s should. The kid couldn’t have been a day over 18. What little faith I’d staked in the skimpy life vest strapped around my neck vanished the moment he uttered, “Dude,” like he was doing some bad Keanu Reeves “Bill and Ted” impression–only clearly, he wasn’t. He clapped a jovial hand to my shoulder. “Duuude. This is going to be some ride.”  

This is how Day 3 of our Arches National Park adventure began. Road Trip 2014 took us through 9 National Parks and 6 states with a Colorado River whitewater rafting trip serving as a highlight and splurge we’d carefully budgeted for. Only now, standing in a Moab parking lot being fitted for life vests, I was sort of wishing we’d sprung for a safe little float trip instead. You know–calm. Mellow. Post-pubescent guide.

We jumped into a rickety jeep sans seatbelts and zipped off to our put-in site near Fisher Towers, 45 minutes away. While our Canyonlands by Night and Day guides chirped about the myriad ways we could potentially die on this tour (waivers, liability, blah, blah), I had time to contemplate how little I cared for adrenaline rushes and how fond I’d grown of breathing. With warm gusts making bird nests of our hair, we cruised down the highway to a rash of exuberant high-fives and Lynyrd Skynyrd blaring from the front-seat boom box.

Nodding along to the beat, our guide explained how high water had turned our heretofore Class I and II section of the Colorado into more sizeable Class II and III rapids. He winked at our youngest–a hair over three feet and 30-some-odd pounds–small fry by any standard.

“You ready to hang tight and get wild, little guy?” he said, reaching across the seat to muss our son’s hair. He studied the life vest dwarfing our youngest’s face, clearly a size or two too large despite falling within the recommended age range for this trip before turning to me.

“He can swim, right, Mom?” he asked, almost as an afterthought. “I’m kidding,” he deadpanned.

Once at the put-in site, we learned that the guides would lead four separate tours. As a party of five, we were assigned own raft and guide–ours being the gangly teen with the lashes and curly locks girls would kill for, of course. With a trademark grin, he threw gear into our raft–extra life vests, a first aid kit (“You’re a Scout mom; you know how to use this thing, right?” he said with a wink), Tevas, sunscreen–and chatted up the kids about school and Scouts and Arches. I’ve no doubt the conversation seemed natural because he was young enough to be their older brother, but I was grateful for his easy rapport with the kids. “Relax, Mom!” he said to me more than once. “I promise you, this is going to be so much fun.”

IMG_20140615_090353-SMILE
At Fisher Towers, getting rid of pre-ride jitters
IMG_20140615_090851
Our put in site, 45 mins from Moab
IMG_20140615_112438
Enjoying a breather without life vests

And oh, did we have fun! Despite my initial misgivings, our first-ever whitewater rafting adventure turned out to be a true trip highlight for us. Our guide explained how to lean into the center of the raft through the rapids and how to angle our bodies if we fell in. Boy, were we surprised to learn we’d be sitting on the edge of the raft and not inside it! Our guide expended all his elbow grease rowing while we focused on gripping that raft line for dear life. Being on the water was calming, however, and it wasn’t long before we found ourselves savoring the unique perspective the river provided: orange sandstone climbing toward the sun, the Colorado River snaking into the horizon. Our guide regaled us with brushes with celebrity–”Bon Jovi rented out that sandstone tower to film his music video!” (“You weren’t even alive when that video came out,” I quip; his smile concedes it’s true)– and Moab trivia. It was all so calm and un-rapids-like that we were lulled into thinking that maybe this was the extent of the ride.

IMG_20140615_092434
In which we find out we’re sitting on the edge of the raft, not in it!
IMG_20140615_095115
This view made everything better
IMG_20140615_102409
View from the raft, Fisher Towers 2014

But this was a whitewater rafting tour after all, and it was just a matter of time before our ride turned bonafide wet and wild. From around the bend, Onion Creek Rapids looked like little more than gentle froth, but the sly grin on our guide’s face told us otherwise. “Lean in!” he hollered, paddling directly into the effervescent white. With a whoop and an explosive geyser-spray that drenched us head to toe, we were off! The raft rocked wildly to and fro, battered about by the swirling eddies. We ebbed and crested for what felt like minutes; at one point, I could swear the raft leapt right out of the water. The kids screamed with delight, Mom loudest of all.

“Again! Again!” the kids shrieked. We couldn’t get enough of the frothy white stuff, urging our guide to maneuver a long path through the next set. It was equal parts thrilling and terrifying in the most addictive of ways. I could see why people did this year after year. I wasn’t sure I’d ever have the guts to hoist myself back into a flimsy raft after this, but man, was it ever a rush. We floated through Fisher Towers with eagle eyes peeled for whitewater, screaming and laughing like loons every time our raft went flying through the air. Before we knew it, we were on the edge of the last rapid, our 3-hour ride all but over. Our guide was awesome, prolonging the ride as best he could by not paddling. Rapids being rapid, however, we were soon in the shallows and docking along the river bank. We’d had an absolute blast–I can’t recommend Canyonlands by Night and Day highly enough! If whitewater rafting isn’t your thing, Canyonlands by Night and Day also offers jet boat tours, zip lines, and ATV tours in the area.

IMG_20140615_094639
Holding on for dear life and having a blast
IMG_20140615_102203
In between rapids, the kids got a chance to row the raft
IMG_20140615_094610
The calm before the rapids
IMG_20140615_110643
The frothy white good stuff!

After a bumpy jeep ride back to the company office in Moab, we spent the rest of the afternoon hiking in Arches. Hikes #1-5, including Landscape Arch, Double O, Balanced Rock, Double Arch, and Delicate Arch, may be found here.

  • Hike #6 Windows + Turret Arch: This easy 1.2 mile trail brought us up close and personal with North and South Windows and Turret Arch, all of which can be readily viewed from the road. What’s the point of hiking when you can easily see these arches from the road, you ask? Well, everything, really, and perspective, mostly. There’s something both humbling and sacred about being in the presence of these temporary giants. It’s a feeling that can’t be replicated from the car. To clamber up boulders at the base of an arch or lay in the shade of a multi-ton wrinkle-in-time is to know the immense awe of these natural wonders. Arches does a fantastic job of maintaining the accessibility of this trail, making it perfect for kids and adults of all ages and abilities.
    IMG_20140614_123233
    North and South Windows; note the line of people ants ascending the base!
    IMG_20140614_114250
    Easy trail to the Windows
    IMG_20140614_114702
    Not quite sure how this became our universal Arches pose 😀
    IMG_20140614_115052
    The kids completed their Junior Ranger booklets under this arch
    IMG_20140614_122106
    Turret Arch looks small from a distance
    IMG_20140614_122216
    But grows larger and larger the closer you get

    IMG_20140614_122619
    …And larger still! We’re the colorful specks at the base of Turret Arch
  • Hike #7 Park Avenue: This moderate 2-mile out-and-back trail evoked a skyscraper-lined cityscape hewn from stone. The steep descent toward the Courthouse Towers made for a moderate return climb under afternoon sun, but this is a very doable hike for littles if timed properly. The Three Gossips was our favorite formation by far, capturing our imaginations with its uncanny resemblance to a conspiring threesome. With formations like the Organ, Sheep Rock, and Tower of Babel, Park Avenue Trail is sure to spark your imagination, too.
    IMG_20140615_132741
    Park Avenue is such a fitting name for this trail
    IMG_20140615_133137
    Wandering Park Avenue after whitewater rafting
    IMG_20140615_140532
    Looking up, you really get a sense of how enormous these formations are
    IMG_20140615_135817
    My three silly gossips!
    IMG_20140615_134927
    The OG Three Gossips
    IMG_20140615_133915
    Exploring Park Avenue; it’s hard not to feel little here

    IMG_20140615_135859
    Arches 2014
  • Bonus birdwatching hike in Scott Matheson Wetlands Preserve: Located less than ten minutes from the entrance to Arches, this lovely one-mile boardwalk loop meanders through fragile wetlands providing sanctuary to more than 200 species of migrant birds. While spring and fall might prove more fruitful for spotting seasonal migrants, our time in the Preserve was unfortunately a bust. We enjoyed exploring the informational kiosk and shaded gazebo, but afternoon summer heat rendered any potential bird activity non-existent. Still, this peaceful stroll through lush wetlands was like striking oasis gold amid Moab’s ubiquitous desert red rock.  
    IMG_20140614_151356
    Beating the heat at Scott Matheson Wetlands Preserve

    IMG_20140614_151415
    On the trail; no luck this time with the birds                   

Hikes are short and sweet in Arches, making this sandstone playground imminently accessible to both young and young-at-heart alike. With a bevy of great trails to choose from, a daily six-mile cap proved key in keeping our five-year-old (and thus mom and dad!) sane and happy. A three-day timeline worked well for us, allowing for leisurely hiking and ample time for fun extras like swimming. Your mileage may vary (pun intended, groan!)–families with older kids or hardier littles might easily squeeze these hikes (and then some) into a single day.

My one regret? Missing the Fiery Furnace ranger-guided tour. Exploring Fiery Furnace without a guide is allowed, but I think we’ve all seen “127 Hours”–um, no solo off-the-grid hiking for me, thanks! I hemmed and hawed over our youngest’s skill level and safety for this hike and missed our window of opportunity; I’ve been kicking myself ever since. These tickets sell out fast, so don’t let my mistake be yours: snatch them up and reconsider later–you can always return them if need be. Whether you’re a thrill-seeking adrenaline junkie or first-time hiker, Arches offers something special for everyone. Linger a while, and let yourself be moved.

Also from Road Trip 2014: Bryce Canyon, Canyonlands, Zion, Mesa Verde 

3 Days in Arches: 7 Family-Friendly Hikes + Whitewater Rafting Fisher Towers, Part I


A few years ago, I picked up a well-loved, second-hand copy of Time Magazine’s “America’s National Parks” at a library book sale. Call it kismet: I’d mistakenly yanked the book off the shelf thinking it was a Hawaii hiking guide. Our youngest was still in diapers, and we’d yet to embark on a single road trip or visit any National Park other than Hawaii Volcanoes or Haleakala. Flipping through the pages, though, I was spellbound. Smack dab in the center of the book was a sunrise photo of Delicate Arch in Arches National Park. I didn’t know how, and I didn’t know when, but I promised myself there and then that we’d be standing at Delicate Arch someday.

Three years later in 2014, we took a leap of faith and planned a Southwest National Parks road trip. Our youngest was only five, and we weren’t sure how he’d fare with all of the hiking and driving, but we’d had a taste of Mount Rainier and Redwood in 2013 and found ourselves craving more. It was a challenging itinerary–9 parks in 18 days towing 3 littles over 3,000 miles–but 2014 holds a special place in our hearts as our first in-depth Parks experience. If we were smitten before, we were head-over-heels this go-round!

We visited Grand Canyon and Mesa Verde before stopping at Arches for 3 days. With a quick stop at the Visitor Center to view the park film and exhibits, we spoke with a park ranger regarding trail conditions and Junior Ranger booklets. Our youngest was especially thrilled to borrow a Junior Explorer bag. With binoculars, a jeweler’s loupe, colored pencils, field guides, and an activity binder, this backpack was free to borrow and held our youngest’s rapt attention throughout our stay. After participating in a kid-geared Ranger Talk (Highly recommend! We love Ranger Talks and try to squeeze in as many as we can), we set out to explore:

  1. Landscape Arch (1.6 miles + 0.5 miles more for Pine Tree and Tunnel Arches): From the moment we stepped foot in Devil’s Garden, the striking terrain was like none we’d experienced before: orange sandstone against the bluest of skies, miles of desert sand giving rise to wild green junipers. It was a divine master class in complementary colors and textures. The trail itself was relatively flat with minimal elevation gain; gravel and sand underfoot made Landscape Arch accessible to all. At 290-feet long, Landscape Arch ranks among the five longest arches in the world, but what is perhaps more impressive is its improbable width. Impossibly long and thin, this oxymoron of a spindly mammoth seems to defy the laws of physics.
    IMG_20140613_122312
    Beginning of Landscape Trail in Devil’s Garden
    IMG_20140613_124246
    I love this photo, if only for the sibling love
    IMG_20140613_124252
    Utah’s summer skies are the brightest and bluest I’ve ever seen
    IMG_20140613_124303
    The color contrasts and sandstone formations on this trail were amazing!
    IMG_20140613_150010
    Landscape Arch, 2014
    IMG_20140613_150254
    I know it’s horrible to shoot into the sun, but I loved the head-on angle here

    Unfortunately, it was 94 degrees the day we visited, and our youngest had no intention of hiking another four miles, so we divided and conquered: the hubby took the youngest an extra half-mile to Pine Tree and Tunnel Arches (which they loved), while the older two and I continued on to Double O Arch.

    IMG_20140613_135325
    Hanging out at Pine Tree Arch

    IMG_20140613_134627
    Tunnel Arch, 2014
  2. Double O Arch (additional 3 miles RT from Landscape Arch + 1 mile more for Partition and Navajo Arches): The trail becomes significantly more challenging after Landscape Arch. The gravel and sand trail morphs into steep inclines, slickrock scrambling, and narrow fins. While doable for older children (ours were 9 and 11), parents should exercise caution as this primitive trail contains steep drop-offs and areas of exposure. We lost the cairn trail several times, but hiking to Double O was worth every ounce of effort. The Disneyland crowds vanished the minute we left Landscape Arch, affording us blissful solitude the entire way.
    IMG_20140613_131036
    The Primitive Trail is steeper and more rugged than Landscape Arch trail.
    IMG_20140613_135221
    Final fin before Double O (note the brave soul standing atop the fin for scale)

    The kids enjoyed climbing the endless slickrock until the final fin to Double O when the wind suddenly picked up. Sand whipped into our eyes, and we dropped to all fours as persistent gusts threatened to knock us from our narrow perch. Low-pitched wind howled through rock wall tunnels, adding to the eeriness of the experience. Several parties ahead of us turned back, urging us to do the same for the kids’ safety. Being stubborn, we soldiered on for a few minutes until a rogue gust nearly knocked the kids off a narrow fin. Pride goeth before a fall, and I wasn’t sticking around to lose a kiddo to hubris. While disappointed to turn back so close to Double O, we were happy to have at least caught a glimpse of the overlook. Turning back turned out to be serendipitous as our favorite Arches experience occurred at Partition and Navajo Arches on our return trek. Partition Arch in particular framed an insanely gorgeous vista at a dizzying elevation. There were shaded shelves on either side of the arch that made for lovely impromptu sketch studios; moved by the spirit and beauty of Arches, we journaled here for close to an hour.

    IMG_20140613_143832
    Navajo Arch: we had this one all to ourselves. Strong winds made bonsai out of these trees!
    IMG_20140613_141126
    The partition in Partition Arch
    IMG_20140613_140912
    We couldn’t get enough of that arch-framed vista
    IMG_20140613_142341
    One of my favorite moments at Arches

    IMG_20140613_142538
    Lovely shaded spot on the opposite side of Partition Arch for journaling
  3. Double Arch (0.5 miles): Though tuckered out from Landscape and Double O Arches, the kids caught their second wind at Double Arch. A gentle half-mile stroll led us to the base of this spectacularly intertwined behemoth. We lay humbled beneath Double Arch and watched clouds roll by before climbing out as far as we could along the sandstone ledges. Though you could easily check Double Arch off your list in half an hour, we loved lingering here. Exploring every nook and cranny fostered an intimate sense of connection to the park; the kinesthetic and visceral connections forged here remain strong for the kids to this day. Our youngest still talks with affection about exploring Double Arch with his jeweler’s loupe!
    IMG_20140613_161557
    Double Arch Trail. This structure reminded us of Tatooine.
    IMG_20140613_162059
    Beneath Double Arch
    IMG_20140613_162308
    Looking out from under Double Arch. I could never get tired of this view!
    IMG_20140613_162524
    We sat here for over an hour, watching the clouds roll by
    IMG_20140613_163449
    We can’t recommend the Junior Explorer bag enough–free to borrow and sure to keep littles engaged for hours
    IMG_20140613_162647
    Exploring Double Arch

    IMG_20140613_162302
    The trail back is almost as beautiful as the arch itself
  4. Delicate Arch (3 miles): Though NPS classifies Delicate Arch as difficult, most families would probably find it more moderate. There is a 200-yard ledge near the end with drop-offs, but not to the degree or sketchiness of Double O Arch. Traversing the rocky terrain is safe and doable for even the youngest of hikers if taken slow. With a 7 am start time on Day 2, trailhead parking was plentiful, and we were able to avoid the previous day’s soaring midday temps. The landscape evoked “John Carter’s” arid slickrock glory, offset only by Utah’s endless blue skies. Long, rocky inclines allowed the kids to choose their own path between cairn markers, making for a memorable experience. Rocky inclines gave way to spiraling rock stairways, eventually yielding to a narrow ridge pathway boasting multiple arch sighting opportunities across the valley (keep your eyes peeled!).
    IMG_20140614_084310
    Hiking Delicate Arch, 2014
    IMG_20140614_075941
    Our youngest was 5 at the time and loved this trail!
    IMG_20140614_083645
    These desert views never cease to amaze me
    IMG_20140614_083706
    With gorgeous rest stops like these, it was tempting to linger a while
    IMG_20140614_084838
    Picking a path between cairns. The cloud-cover was disappointing at first but such a relief temperature-wise
    IMG_20140614_085850
    Final push to Delicate Arch–I spy 2 arches across the valley

    No matter how many times I’d dog-eared that Time Magazine page or read online about how the arch appears right after this ledge, nothing could prepare me for that first glimpse of Delicate Arch. At over 60-feet tall and 40-feet wide, Delicate Arch holds top honor as the park’s largest freestanding arch, but here’s what mere photos and statistics cannot convey: Delicate Arch is huge. And glorious. And fleeting–a temporal blip in a scheme of eons. It dwarfs and humbles you; you can’t help but contemplate time and tide and the transient nature of existence. On your return trek, be sure to take the short spur trail to Wolfe Ranch Cabin to see an early turn-of-the-century ranch building as well as intricate and well-preserved Ute petroglyphs.

    IMG_20140614_090612
    Delicate Arch 2014
    IMG_20140614_090413
    Three years after marking that Time Magazine book, we’re here at Delicate Arch! It was a surreal moment.

    IMG_20140614_092658
    Delicate Arch. The people at the base of the arch give a sense of scale–Delicate Arch is so much bigger than I’d imagined.
  5. Balanced Rock Loop (0.3 miles): More gentle stroll than hike, kids and adults alike will enjoy walking the circumference of this gravity-defying icon. Studying Balanced Rock from multiple angles gave us a true appreciation for its precarious size and structure. Stay tuned for hikes #6 and #7 and whitewater rafting at Fisher Towers in Arches, Part II!
    IMG_20140614_131547
    Balanced Rock is a sight to behold
    IMG_20140614_132030
    We loved studying Balanced Rock from different angles
    IMG_20140614_130824
    From this angle, Balanced Rock looks exceptionally sturdy

    It’s hard to articulate just how much that little 50 cent book from the book sale changed our lives. In the years since, we’ve visited 21 National Parks and hope to visit 12 more by summer’s end. What began with a dog-eared photo and a promise has evolved to become the thread running through the fabric of our family history. The Parks are a hundred stories of bonding in the rain on the Olympic coast and trout-fishing on Yellowstone Lake and marveling over bighorn sheep on Iceberg Lake Trail. They’re stolen moments of holding hands through a Yosemite meadow and jumping at the top of the world in Mesa Verde. They’re three kids who consistently rank Park Ranger at the top of the ever-evolving list of what they’d like to be when they grow up. In no small way, the Parks have changed the way we see ourselves and the world. We are addicted!

    IMG_20140613_090239-SMILE
    The Mighty Five make Utah one of our very favorite states!


36 Hours On the Oregon Coast + Portland: 9 Free (or Almost Free!) Family-Friendly Activities

Oregon, let me start by saying this: I’m madly in love with your drive-thru espresso kiosks.

I’m all for perking coffee at camp or brewing a cup at a motel, but if you’re visiting the Pacific Northwest, do yourself a favor and treat yourself to one of the indie espresso kiosks you see on every corner. They’re everywhere–weirdly (perhaps especially), in the most rural of areas. And when you’re in a coffee mecca like Oregon? Every cup is guaranteed smooth and delicious. We loved the quirky vibe of these kiosks; we even saw a combo espresso/haircut drive-thru shop. Talk about multitasking! Once you’ve got your caffeine buzz on, it might be fun to consider any or all of the following:

  1. Three Capes Scenic Drive: Instead of taking the 101 inland, veer west and follow the 40-mile coastline for picturesque coastal views that just keep getting better and better. A timeline of an entire day would be ideal, but this scenic drive can also be squeezed into as little as two to three hours with shorter stops. From Newport, we traveled north to Cape Kiwanda in Pacific City, home to Haystack Rock–a less famous but larger iteration of its Cannon Beach counterpart. Cape Lookout State Park brought us to Anderson’s Viewpoint and a view of mysterious Netart’s Bay, framed by old-growth trees and shrouded in fog. Just a few miles away, nearby Three Arch Rocks National Wildlife Refuge offered blue skies and common murre sightings. It’s my understanding that you can even see tufted puffins here.
    IMG_20130622_225031
    Haystack Rock, Cape Kiwanda
    IMG_20130605_085936
    Anderson’s View Point of Netart’s Bay along Three Capes Scenic Drive
    IMG_20130605_092822
    Three Arch Rocks–it’s amazing how much the weather changed along the coast in just a few short miles!
    IMG_20130605_092952
    Cool and blustery morning on the OR coast, 2013
    IMG_20130605_071640
    When in Oregon, give these espresso kiosks a try–so rich and delicious (and convenient!)

    Cape Meares completes the capes trio, affording stunning ocean views, a front-row seat to the state’s largest Sitka spruce–the Octopus Tree, and an historic lighthouse, which brings us to…

  2. Cape Meares Lighthouse: Located just 10 miles west of Tillamook, Cape Meares Lighthouse offers free daily tours between April and October, making for a satisfying conclusion to any Three Capes drive. Unfortunately,the lighthouse was closed for restoration when we visited. We were disappointed, as the 0.2 mile asphalt “trail” was perfect for little ones, and the kids were looking forward to touring the lighthouse. Still, we enjoyed wandering the mile-long scenic trail through old-growth spruce trees that eventually led us to the Octopus Tree. Barking sea lions provided the perfect soundtrack to this Oregon Coast experience.
  3. Tillamook Cheese Factory: As a family that eats our weight in Tillamook cheddar loaves annually (thank you, Costco!), a stop at Tillamook Cheese Factory was a must. What we didn’t expect was to have so much fun! With free admission, the tour itself was self-guided and family-friendly. There were cheesy (I hear you groaning!) cardboard cutouts, vantage points overlooking the entire production, and even a classic VW bus Loaf Love Tour display to goof around on. Our favorite part of the factory tour was the eating–Tillamook provides tons of delectable cheese samples, including cheese curds (a first for us…maybe an acquired texture?), aged white cheddar, and spicy jalapeno varieties, all undeniably delicious. Our favorite, favorite part, however, was the rich and luscious Tillamook ice cream. Almost free, and worth every penny.
    IMG_20130605_112237
    Adventures of Five, coming straight to you from the Loaf Love Tour!

    IMG_20130605_110436 (1)
    Mint chip, pecan praline, and strawberry ice cream at Tillamook Cheese Factory
  4. Astoria Riverfront Trolley: From Tillamook, we drove an hour and a half through rolling hills and bucolic pastures to reach Astoria, a quaint little town on the northern reaches of the Oregon Coast. You may remember Astoria as the memorable town featured in the classic ‘80’s flick “The Goonies;” it’s also home to the Astoria-Megler Bridge, a 5-mile engineering marvel that spans the Columbia River, connecting Astoria to Point Ellice, Washington. While you could easily devote a day or more to exploration here, for those pressed for time, an Astoria Riverfront Trolley tour can’t be beat. For only $1 per person, you can hop on a trolley at any number of locations and see all of Astoria’s major sights in an hour, stress-free. Our conductor relayed fun Goonies trivia, elaborated on Astoria’s colorful maritime history, and entertained and educated us for the better part of an hour. Unfortunately, the younger two were wiped out from all of the day’s earlier fun and fell asleep, but that wasn’t such a bad way to spend an hour, either!
    IMG_20130605_130602
    Astoria-Megler Bridge
    IMG_20130605_130803
    Astoria Riverfront Trolley–at only $1 per person, there’s no better deal in Astoria

    IMG_20130605_133452
    Ocean view from the trolley
  5. Fly a balsa airplane from Astoria Column: While in Astoria, we visited Astoria Column, a 125-foot light tower that overlooks the Columbia River and occupies a spot on the National Register of Historic Places. The spiral frieze on the exterior pays tribute to Oregon’s early history and Astoria’s role therein; the interior features a steep spiral staircase to the top of the column. I’m already on record as being an acrophobe, but I’m thinking I should amend that to include a fear of falling–especially through stair holes! Neurotic but true. Still, the view at the top made it all worthwhile, though the descent was another story entirely (ie: freezing on a flight of stairs while kind strangers literally talked me down). Once at the top, the kids flew simple $2 balsa airplanes we’d purchased and assembled from the gift shop. Watching their planes sail on the wind was a thrill!
    IMG_20130605_142845
    Ready to fly planes from Astoria Column
    IMG_20130605_141327
    View of Astoria-Megler Bridge from the Column
    IMG_20130605_142758
    $2 balsa planes worth their weight in gold

    IMG_20130605_142106
    Astoria Column–don’t let a fear of stair holes hold you back. Wait, what do you mean, ‘that’s just me?’ 😀
  6. Doughnuts, Coffee, and Books: From Astoria, we drove 2 hours inland to our first City of Roses stop: Voodoo Doughnut. For anyone who watches shows on Food Network or Travel Channel, this doughnut institution needs no introduction. With a quirky and fun array of doughnut shapes, flavors, and toppings (Captain Crunch doughnuts, anyone? How about a Voodoo doll-shaped pastry with raspberry blood filling?), Voodoo Doughnut is sure to satisfy any craving. We enjoyed a box of bubble gum, lemon curd, and maple bacon offerings and were lucky to walk right in without any lines. I’ve heard the wait can sometimes span entire city blocks and several hours!

    Energized by sugar, we made the half-mile trek to Powell’s Books on foot. As a YA novelist, pilgrimaging to this book mecca was a must, and we happily wandered the aisles for several hours. The return trek to our car was made heavier by impulse book purchases (impossible to avoid at Powell’s!), but a stop at iconic Stumptown Coffee Roasters for afternoon espresso and hot chocolate fueled the walk back. I’m a huge fan of Seattle’s Storyville Coffee, but this rich and smooth espresso rivals the best. While the clientele here was younger and far hipper than we could ever hope to be, the set-up made for a very family-friendly stop.

  7. International Rose Test Garden: After an action-packed day, our final stop for the evening was the International Rose Test Garden for a beautiful and fragrant sunset stroll. Admission was free, but I would’ve gladly paid to see these rose beauties in a city renown for them. Lovely gazebos, pathways, and benches enhanced the experience, and the kids enjoyed the sheer variety of blooms, from jumbo-sized varieties to the smallest miniatures in every color of the rainbow. Plus, we couldn’t resist the opportunity to stop and smell the roses. 🙂
    IMG_20130605_185610
    International Rose Test Garden Portland, OR
    IMG_20130605_190218
    Stopping to smell the roses after a long day

  8. Historic Columbia River Highway and Multnomah Falls: The next morning, we drove half an hour from Portland along Historic Columbia River Highway to spectacular Multnomah Falls, the tallest waterfall in Oregon. At a height of 620 feet, the falls are divided into an upper and lower section, with a footbridge spanning the lower cascade. Unfortunately, we were pressed for time and had to stop at the footbridge overlook, where we reveled in the falls’ powerful spray and the lush greenery of the gorge. A return trip is in order to venture to the top of the falls for a bird’s eye view.
    IMG_20130606_090420
    Spectacular Multnomah Falls
    IMG_20130606_090121
    I wish my little camera phone could do Multnomah justice, but it just doesn’t

    A previous winter solo trip to the Columbia Gorge led me to 2.4-mile Lautorell Falls Loop and half-mile Bridal Veil Falls loop, another stunner in a region of exquisite beauty. Combining Lautorell and Bridal Veil Falls with Multnomah would make for a particularly lovely morning of waterfall exploration.

  9. U-Pick Strawberries at Bella Organic Farm: We ended our time in Portland picking strawberries at Bella Organic Farm on Sauvie Island. Living in the tropics, pineapples and sugarcane mark the extent of our fruit experience, so picking strawberries at Bella Organic Farm was a treat for all of us! There’s no cost for admission, and all seasonal u-pick fruit is sold by the pound. We foraged for the brightest, juiciest sun-ripened strawberries we could find, quickly filling three buckets and then some. We devoured 6 pounds of berries on the drive over to Seattle, and though there were several “Pull over, I’m going to puke!” false alarms, everyone kept their cookies (and berries) in check. We absolutely loved picking our own fruit and can’t recommend the experience enough.
IMG_20130606_110414
They picked 8 pounds of strawberries…
IMG_20130606_110311
…and ate 6 pounds en route to Seattle…
IMG_20130606_110239
Between carsickness and berry-sickness, it was quite a memorable ride!

36 hours on the Oregon Coast and Portland was not nearly enough, but it was certainly long enough to whet our appetite for more! With an abundance of outdoor and city-centric attractions, the coast and Portland offer so many budget and family-friendly opportunities that we’d love to try someday, especially now that the kids are older. Even so, we loved that these nine activities were accessible to the littlest of littles, making our 2013 road trip memorable for both the grownups and little ones enjoying the ride–a special and gratifying mix, courtesy of Oregon.

Walking Among Giants: Redwood National Park & Oregon Dunes National Recreation Area

Every morning in the second grade, our class would belt out “This Land is Your Land” while our teacher held up photos of Redwood National Park and diagrams of the Gulf Stream current to illustrate the patriotic tune’s famous verse. Seeing California’s redwoods has topped my bucket list ever since. To a second grader stuck on a tropical island, nothing seemed more mythical than millennial giants towering over coastal cliffs. The reality three decades later, though? Even better.

After leaving Point Cabrillo Lighthouse (click here for San Francisco/Point Cabrillo Lighthouse trail), we checked into Seabird Lodge in nearby Fort Bragg. It was one of the nicest motels we’ve ever stayed at, probably due in no small part to its proximity to exclusive Mendocino. ‘Posh motel’ might sound like an oxymoron, but with full amenities, spacious rooms, and upscale decor, Seabird Lodge felt more like a coastal bed and breakfast escape than a motel. Given the chance, we’d gladly stay here again.

At the front desk’s recommendation, we dined at D’Aurelios, a gem of an Italian eatery hidden in an unassuming strip mall. This humble diner was true Guy Fieri material: impeccable service, reasonable prices, and outstanding food made this one of our best road trip finds ever! It was hands down the best pizza I’ve ever eaten in my life. Pizza sauce wasn’t something I’d ever given much thought to before tasting D’Aurelios garlicky, addictive, and downright crave-worthy sauce. This stuff was ambrosia!

IMG_20130602_201728
D’Aurelios makes THE most amazing pizza! Their “side salads” were gargantuan and delicious, too.

After some much needed rest, we ventured north toward Avenue of the Giants, a 31-mile stretch of old Highway 101 encompassing Humboldt Redwood State Park and purported to contain the most scenic display of redwoods in the area. It did not disappoint.

IMG_20130603_163204
I couldn’t get enough of that soft light filtering through the trees
IMG_20130603_162705
A true towering giant
IMG_20130603_164551
The kids took to calling the soft beams ‘God light,’ which seemed very fitting
IMG_20130603_162506 (1)
Well, hello, little banana slug

Avenue of the Giants redefines the term ‘enchanting.’ Here, sky surrenders to colossal trees and Lilliputian cars wind through shaded bends. You stretch your neck to pinpoint where canopy ends and sky begins, but it’s folly; even from the forest floor, it’s clear the redwoods climb forever and then some. The forest is all dappled light and prehistoric ferns and majestic giants, but it’s a fragile magic. Too often, we found ourselves seeking ever taller trees instead of appreciating the splendor of the forest. One of the best decisions we made was to pull over and wander on foot for a mile or so. If ever we believed that any of the trees were anything less than tall, all we had to do was lay on the ground and look up for a minute to realize the futility of comparing height when you’re talking redwoods. Walking among gentle giants, enveloped in the kind of deep silence that speaks to the passing of millennia, we loved the peace and serenity afforded here.

IMG_20130603_101402
Redwoods may not boast the same breadth and girth as sequoias, but their trunks are still massive!
IMG_20130603_100321
Hubby posing for scale, Avenue of the Giants
IMG_20130603_102420
Playing by the creek, surrounded by redwoods
IMG_20130603_101811
She loved standing in her own custom redwood spotlight

From Avenue of the Giants, it was another hour and a half to Redwood National Park. With a stop to admire Gold Bluffs Beach and check on trail conditions at Kuchel Visitor Center, we got down to business hiking Fern Canyon Loop trail. Fern Canyon is a 1-mile loop through a verdant gully painted in ferns. I’d read that this hike was a must-do (it is!) but failed to note how much of the hike was through a creek, so we got wetter than expected. I’d highly recommend Tevas and towels for this one. The kids enjoyed scrambling over logs, crossing swampy boardwalks, and wading through calf-deep water (thigh deep for our preschooler!): Mom and Dad loved the otherworldly ambiance created by the spectacular 30-foot canyon walls of ferns. The trickling of the creek and the dank, lush gully combined to make this hike a family favorite.

IMG_20130603_150342
Entrance to Fern Canyon Loop
IMG_20130603_145655
Lots of fun creek crossings
IMG_20130603_150019
The kids loved clambering over the wet logs and boardwalks
IMG_20130603_150141
Fern Canyon, Redwood National Park

We circled back to Prairie Creek, hoping to catch a glimpse of Redwood’s famed Roosevelt elk. Aptly enough, we found a herd taking respite in the shade at none other than Elk Prairie itself. The was the kids’ first wildlife sighting, and they couldn’t have been more thrilled! We pulled over and watched the family of elk for quite a while before continuing on.

From Elk Prairie, it was back to Prairie Creek Visitor Center to walk 0.3-mile Circle Trail. Realizing we were pressed for time, we nixed 1-mile Lady Bird Johnson Grove Trail from our itinerary in favor of Circle Trail. This easy, level trail was perfect for our 4-year-old, who’d had his fill of driving and hiking by late afternoon. Even he couldn’t begrudge the chance to see Big Tree, a 1,500-year-old colossus and true superlative in a park full of biggests and tallests. Having the trail to ourselves was a treat; in fact, we’d barely passed another soul all day. Redwood might be packed to capacity during the summer, but we were fortunate to visit during the first week of June when many schools were still in session.

IMG_20130603_163715
Big Tree: 1,500 years old!!
IMG_20130603_163731
Big Tree stands a whopping 304 feet tall

We ended our time in Redwood National Park driving 9-mile Coastal Drive Loop. With narrow, unpaved roads and blind curves skirting precipitous cliffs, this 1-hour drive is not for the faint of heart, but the payoff in panoramic views of the Pacific is unsurpassed. I love Hawaii and our beautiful ocean views, but there’s something about the California coast that speaks to me. It’s a quintessential mix of rugged beauty and slate-blue water just shy of inviting; blue skies tempered by fog echo the mild but untamed sentiment of the coast.

IMG_20130603_171923
Stopping to stretch our legs on Coastal Drive
IMG_20130603_172711
Coastal Drive, Redwood National Park
IMG_20130621_151803
The views were worth those scary hairpin turns
IMG_20130621_215655
View of the California coast from Coastal Drive (please forgive the poor photo quality; these were taken on an old phone)

By sunset, we were more than ready for dinner at Good Harvest Cafe, a Crescent City eatery with an emphasis on local, organic cuisine. Dinner was pretty good, though I’ve read rave reviews about Good Harvest Cafe’s brunch fare–worth a try if you’re in the area. We settled in for the night at Front Street Inn with an ocean view of Battery Point Lighthouse to lull us to sleep.

The next morning, we awoke early to cross the California border into Oregon. We traveled the coast for 3 hours, admiring lonely sea stacks and pelicans before arriving at Oregon Dunes National Recreation Area. Encompassing more than 40 miles of sand dunes in Reedsport, OR, Oregon Dunes NRA represents the largest stretch of coastal sand dunes in North America. The tallest specimens reach 500-feet high, providing recreational opportunities galore, including dune buggying, canoeing, hiking, and camping. We enjoyed a picnic lunch high atop a covered bluff before venturing down to the sand. Sand and surf may define our summers, but we’d never seen anything like this before! The dunes are marked by undulating sand ripples, paralleled endlessly across miles of coast. There is a hypnotic quality to the unbroken ripples that initially made us reluctant to mar the sand with footprints, but it wasn’t long before we were running and sliding down the dunes, getting the cardio workout of our lives. What comes down must first go up, and climbing up those steep dunes was tougher than we expected! We would have loved to spend all day here, but we had another 100 miles to cover before our final stop for the night: Newport, OR.

IMG_20130604_083244
This was the kids’ first time crossing a state line; OR marked their first state outside of CA and HI.
IMG_20130604_131703
Like sands through the hourglass…Oregon Dunes National Recreation Area
IMG_20130604_131911
Loved the ripple pattern–so striking over miles of dunes
IMG_20130701_110725
Life-size sandbox
IMG_20130604_133542
That dark speck at the top is the oldest. Sliding downhill didn’t work out so well, but running downhill was lots of fun

With a quick bird-watching stop at atmospheric Heceta Head Lighthouse, we arrived at the Oregon Coast Aquarium in Newport a little after 3 pm. Normally, I’d hesitate to pay for admission knowing we only had a few hours left to closing, but we had a 60% off Groupon that sweetened the deal. The adorable sea otter exhibit was a big hit with the kids, as were the walk-through shark tunnel, aviary, and interactive kids’ exhibit.

IMG_20130604_151427_1
Birdwatching at Heceta Head Lighthouse; seeing pelicans up-close was a thrill!
IMG_20130604_151516
Rugged beauty, Heceta Head Lighthouse
IMG_20130604_151501
Quintessential PNW mystique
IMG_20130604_150121
Oregon coastline, near OR Sea Lion Caves, Florence
IMG_20130604_161815
Oregon Coast Aquarium, Newport, OR

We chowed down on clam chowder and seafood at Newport Chowder Bowl, followed by a chilly evening on the beach. Like many quaint summer towns along the Oregon coast, Newport exudes a laid-back, boardwalk charm that we’d love to explore more fully someday. In hindsight, it might have been wiser to explore the coast over 2 weeks instead of cramming it into 5 days, but I’m grateful to have gotten a taste of the coast. Even as I plan Road Trip 2017, this is an issue I continue to struggle with: is it better to see someplace for a little while than never to visit it at all? And what if doing so comes at the expense of more fully enjoying a single destination? This area is very gray to me, so please feel free to weigh in with your thoughts. There’s no denying we were National Park Road Trip rookies in 2013, making classic rookie mistakes: too much time driving, too little time experiencing, and way too much rushing around. No regrets, though; without that experience, we wouldn’t have had a baseline to know what worked and didn’t work for us. Best of all, 2013 was a pivotal year for falling in love with National Parks and road trips–and that’s something I wouldn’t trade for the world.

IMG_20130604_183107
Newport Chowder Bowl–their namesake chowder was so creamy and delicious
IMG_20130604_191804
Can you tell we were a little cold? 😀
IMG_20130624_215432
Father and son bonding time, Oregon Coast (Newport)


Saving Money for Travel: 6 Practical Tips We Follow

Before we continue with Road Trip 2013, I want to get serious for a moment about a touchy subject: money.

Growing up, my family didn’t have a ton of money. I had the best childhood, absolutely, but making ends meet was always a struggle. Free bus program, reduced lunch fare, and hand-me-downs were part of the norm; dinners out and interisland vacations to Honolulu were a huge treat. Like a lot of kids in the state, flying to the Mainland wasn’t something we could afford. My first trip to the Mainland didn’t happen until I graduated from high school–and only because we’d won a free family trip to Disneyland.

To be honest, our financial situation isn’t very different today, albeit for different reasons–tuition, mainly. To be clear: this is our own doing; we’ve chosen the school situation our children are in, and we’re equally aware that riding the tuition carousel is also a choice. And while we’re fortunate not to carry credit card debt, the monthly budget struggle? Very real.

Why do I mention this? Well, mostly because it’s true, I guess. And also because I don’t believe we’re the only family in this situation. Browsing through blogs and social media, it’s easy to assume others’ situations. I know I’m guilty of this. The thing is, online presences are filtered; they provide rosy glimpses into small facets of people’s lives. The same is often true of real life–I have friends who believe we have endless discretionary income given our summer trips.

Nothing could be further from the truth.

Everything we do is done on a strict budget; we simply don’t have the means to afford travel on a whim. With little to no discretionary income, we make everyday frugal choices in order to be able to pay for travel out-of-pocket. Some might equate frugality with sacrifice, but frugal living is a lifestyle that affords us travel opportunities–opportunities which enrich us in ways that material items cannot. There are two general areas where we try to save–pre-travel and during-travel–and while most of these tips are common-sense, I hope that being honest here might be helpful to you, wherever you may be in your journey.

Make travel a priority

This isn’t a tip so much as a mindset. When you make travel a priority, you’re more inclined to make in-the-present sacrifices for delayed travel gratification. You learn to value experiences, not “stuff.” You’re also less likely to view sacrifices as deprivation; rather, they’re a way to fund those travel experiences you just can’t put a price tag on. Make travel non-negotiable, and you’re well on your way to finding the means and gumption to making it happen.

Make your credit card work for you

Financial advisors espouse a cash-only approach to purchases, but as a travel proponent, I’d argue just the opposite: get a credit card, and make it work for you. (The following is not sponsored in any way; it’s simply my humble opinion.) Alaska Airlines Visa Signature has been a game changer for us. For one, Alaska is a budget airline, making it the cheapest option (next to Allegiant) for travel to and from Honolulu and thus our airline choice, regardless. The fact that Alaska Visa Signature offers an annual $99 RT companion fare is icing on the cake. Spouses can apply for individual cards, meaning your family, like ours, could be eligible for two $99 round trip companion fares a year. That’s $200 for two round-trips to/from Hawaii! Alaska Visa Signature also offers a huge 30,000 miles bonus for spending $1,000 in 3 months. If you’re a family charging all of your expenses, this isn’t difficult to achieve. We charge everything–food, gas, utilities–and pay off the balance monthly with the end goal of annual travel. And 30,000 bonus miles may not sound like much, but for us, it translated to one free round trip from Hawaii to the Mainland this year, a $600 value. Factor in those two $99 companion fares, and you’re looking at paying only $200 for THREE round trips to/from Hawaii. Switching to Alaska Visa Signature has helped our family realize thousands of dollars in savings. Delta offers a similar program, and for those who travel internationally, Chase Sapphire Reserve also has an excellent rewards program. Another great perk of Alaska Visa Signature is free check-in baggage for 6 travelers. Though we’re all about limiting check-in bags, this perk alone easily translates to $100 savings for us annually.

IMG_20150705_075329
Breakfast at Old Faithful Inn, Yellowstone NP–a budgeted treat
IMG_20150707_183341
Dinner at Roosevelt Lodge, Yellowstone NP–budgeted treat

Plan a monthly and annual budget

For those of us in denial about spending, getting nitty gritty with expenditures can be harrowing. Still, you can’t know where you’re headed until you know where you’ve been. Track spending for several months; track spending across an entire year. Break your spending down across categories and calculate monthly and annual expenditures for individual categories. Spreadsheets work well, but pen and paper work just as well (I’m old school when it comes to stuff like this). For categories, think mortgage; groceries; sundries; gas; home, health, and car insurance, taxes, and registration; birthday gifts for friends/family; “fun” money for eating out or leisure activities; and tuition. Now evaluate these expenses against your monthly income. The goal is to ensure your income is greater than your expenditures–in other words: to live within your means. If you’re spending more than you’re making, it’s time to take a hard look at expenditures to determine what can be reined in. If you’ve already determined that travel is a priority, your choices become clearer. Depending on your lifestyle, it might also be important to allot extra for holiday food and gifts (we do this), retirement, college, rainy day fund, and other expenditures that are seasonal in nature, thus requiring less frequent (but necessary) contributions. Find categories you can scale back on (see next tip), and funnel any savings into your travel fund. Set monthly and annual expenditure goals, and–this is key!–stick to them.

IMG_20150630_192646
Cooking dinner at camp; Rocky Mountain NP
IMG_20150626_200342
Camping and cooking are affordable travel options for our family

Rein expenses in

Easier said than done, I know. But also? Very doable. We try to keep our grocery expenses under $500 a month. Hawaii’s cost of living is among the highest in the nation, and as a family of five with two teens, we cook and eat a LOT. Still, groceries are infinitely cheaper than eating out. At our kids’ school, school lunch runs $5 a kid. That’s $15 per day, $75 per week, or $300 per month in school lunch alone! Instead, we pack a mostly organic lunch daily for under $100 a month. We save $200 a month–a savings of $1,800 a year–and we’re also able to ensure the kids get a good dose of fiber, veggies, and fruit daily. We also rarely eat out–three times or less per month. For our family, eating out often means a tab of $50 or more for one meal–$50 that could feed us three meals a day for the better part of a week. That’s not to say that we deprive ourselves or don’t have fun. We just try to choose wisely. Dinner out can be as inexpensive as $10 for a gigantic Costco pizza; breakfast and lunch are cheaper dining-out options than dinner. We stock our freezer with items like Kirkland lasagna and Aidells chicken meatballs for nights when busy schedules or laziness tempt us to order out. While more expensive than cooking, they’re a cheaper option than takeout. To keep our budget livable, we roll over savings from month to month. For example, if our dining out expenses come in under $150 in January, we roll over any savings to February. In this way, we are able to occasionally afford more expensive “treat” dinners several times a year. (Korean yakiniku BBQ is the kids’ favorite!) Only in December do we transfer any rollover to our travel account. The goal is a livable budget–not torture!

Other ways we save? Limit Starbucks runs by brewing coffee at home for pennies per cup; watch Netflix and save yourself $15 per movie ticket. For the most part, we’ve stopped exchanging holiday gifts with friends and family. Instead, we plan holiday dates–beach days, evening drives to see holiday lights, and intimate dinners with those we love. These experiences have brought us more joy than material gifts. For what it’s worth, we also don’t spend on shoes, clothes, etc. beyond the bare essentials; we’re lucky to have cousins and friends who keep our hand-me-down supply well-equipped. If clothes and dining out are your thing, however, by all means, go for it! No judgment here. The point is to find target numbers and ways to scale back that work for your income and priorities.

20160623_101415
Holiday beach dates with family make a great alternative to gift exchanges
IMG_20161126_170855
Holiday appetizer party with family, local style
20151220_155334
Decorating cookies with friends and family is a fun and free alternative to gift exchanges
IMG_20161222_085352
Cookies and hot chocolate make for a memorable and inexpensive afternoon

Separate accounts for separate funds

As a family that used to keep savings and checking bundled together in one account, I know how impossible it can seem to realize any savings for travel. Any money we earmarked for travel always got absorbed by incidentals–tires blowing out, washing machine on the fritz, trips to the ER. You can’t predict the future, but you can and should plan on annual incidental expenses. Life happens–often inconveniently. Finances improved for us once we created separate accounts for separate expenses. In our new system, tuition, rainy day incidentals, and travel each get separate accounts. Once a month, we transfer a pre-budgeted amount from checking into our travel savings account. The act of funneling money into individual accounts is empowering, and separate funds means travel money doesn’t get inadvertently blown on towing or impulse purchases from REI (not that I’ve ever been guilty of this!) 😉 In creating your monthly/annual budget, decide how much you can/want to funnel toward travel. To determine this, ask yourself how much a prospective trip might cost. Research baseline prices for airfare, car rental, and lodging, and ask yourself: how important is luxury to you when you travel? For example, given the same dollar travel allowance of $3,000 per year, I would rather take a no-frills, bare bones trip annually than save for a luxury trip 3 years from now. Your family may feel differently, and that’s okay! The point is to be honest about your travel goals so you can stay within your means.

20160814_185032_Richtone(HDR)
Some years, vacations turn into staycations–Malaekahana Beach
20160814_185243_Richtone(HDR) (1)
For $12 a night, you can’t beat fishing here at sunset
IMG_20160402_210559
Crabbing is our favorite night activity at Malaekahana
IMG_20160815_061240
$12 sunrise view from our tent, Malaekhana Beach

Planning affordable travel=recognizing your choices

An annual trip to Hawaii is something most would consider a splurge, and that’s exactly what we’re doing every time we embark on a Mainland road trip, flying to and from Hawaii. Since paying for airfare is non-negotiable for us, we minimize other travel expenses so we don’t incur debt. Aside from two or three dining-out experiences we budget for, we shop for groceries and cook 90% of our meals on vacation. We pack lunches on dayhikes and make Costco runs to keep our snack expenditures in-check. And while an SUV or minivan might be more comfortable than a compact car, they’re also more expensive–renting a minivan for a week costs the same as renting a compact car for a month. You might prefer a shorter trip in greater comfort, and that’s okay; recognizing the choice, though, is key. For example, we love amusement parks, but we also know it’d take us 3 years of no-travel to afford an amusement park trip out-of pocket. Similarly, we love nice hotels just as much as the next family, but for the price of a one night stay, we could also book two weeks worth of campgrounds. Neither option is inherently better than the other; the key is to see your choices for what they are instead of limiting yourself to some preconceived notion of travel. There are multiple options to suit different comfort levels for any given dollar amount. A 2-3 week trip can fit within your budget if you’re willing to forego creature comforts; a luxury trip can also fit within your budget if you’re willing to shorten your length of stay. Whatever you choose, finding ways to be able to pay for your dream trip out-of-pocket makes all the sacrifice worthwhile.

Ode to Road Trips Past: 36 Hours in San Francisco & Point Cabrillo Lighthouse Trail

Locals might poke fun at the stereotypical Hawaii tourist fantasy of grass skirts, coconut bras, and hula-dancing maidens bearing flower lei at luaus, but really, we’re no different when it comes to the Mainland. The truth is Hawaii folk harbor some pretty quirky fantasies about the Lower 48, too. We obsess over IKEA and Trader Joe’s and how many jars of cookie butter we can smuggle home in our suitcases. We yearn for snow days and wood-burning fireplaces. Fantasize about RVs and cross-country road trips. Also, squirrels and raccoons are the most amazing wildlife ever–and no, I’m not even close to kidding.

When I was a kid, there was this commercial that aired between Underdog and the Flintstones. It featured Kalani, a local boy whose family owned property in Montana. Kalani had his very own babbling brook to splash in and an endless backyard of pine forest for horseback riding. He urged Hawaii kids to sell their parents on the merits of beautiful Ponderosa Pines. Come visit me, Kalani, and we can go to Yellowstone anytime we want! I begged my parents daily to move to Ponderosa Pines. Sure, I was only five, but I knew what I wanted, and what I wanted was that. I was sold on the dream.

Fast forward a few decades, and after one fun/exhausting/expensive-as-heck trip to SeaWorld, Universal Studios, Legoland, and Disneyland in 2011 (don’t get me wrong; I love all things Disney!), I recalled those childhood fantasies of RVs, road trips, and Ponderosa Pines. Thus was born the annual family road trip and the dream to see our nation’s parks. To be sure, our road trips looked a lot different in 2013. There were afternoon naps and potty breaks for our preschooler. Motel beds. Restaurant meals twice a day. Hikes were under 2 miles, and parks were sprinkled in almost as an afterthought between museum visits and city activities. Given the chance to go back though, I wouldn’t change a thing. These baby-steps laid the foundation for our appreciation of the size and grandeur of our nation, and perhaps more significantly, the kids’ love for our National Parks and the outdoors.

Road Trip 2013 began with a 5.5 hour flight to Oakland, CA . Flying with an antsy four-year-old was…well, challenging, but we touched down intact just after 11 pm. It was no less challenging to convince said four-year-old that what his little body perceived as 8 pm Hawaii time was in fact very, very late in California time. Between our excitement and the time change, no one slept much, but the troops rallied to hit the ground running early the next morning. Our first stop: San Francisco!

Day 1:

Part of my road trip/Ponderosa Pines fueled fantasies included hanging off a cable car Doris Day-style, so we parked at the Embarcadero and hurried to the cable car turnaround on Powell and Market. There was already quite a line brewing at 7:30 am, but in no time at all, we boarded a Powell and Hyde car and were off to the races–and I mean that literally, because man, those cable cars move fast! The scaredy cat in me reconsidered the hanging from the rails/certain death plan and settled for outward facing seats instead.

img_20130601_091805
Bright and early at the cable car turnaround on Powell and Market

Our next stop was Fisherman’s Wharf for a Golden Gate Bay Cruise. Prior to our trip, I’d found a 50% off Groupon for Red and White Fleet tours and purchased 10 am tickets to circle Alcatraz Island and sail under the world-famous bridge. Given another chance, we’d probably tack on a day tour of Alcatraz as well, but we loved our boat ride nonetheless. Free audio tours sharpened our bearings and helped us pinpoint historic San Francisco landmarks. Being on the water turned out to be a fun way to experience San Francisco with young kids.

img_20130601_103718
Tickets for our GG Bay Cruise
img_20130601_103404
Red and White Fleet cruise; with a Groupon, the cost was very reasonable
img_20130601_104559
Time sure flies…I can’t believe they were ever that little!
img_20130601_110304
We had perfect weather!
img_20130601_110925
Sailing under the Golden Gate Bridge
img_20130601_112859
Circling Alcatraz; next time, we’ll be sure to book a day tour here

Once back at the wharf, we set about to the important business of filling our bellies. And to those of us with Lower 48 fantasies, nothing says San Francisco like Boudin sourdough bread bowls brimming with steaming clam chowder. To this day, I’m unconvinced there’s anything more satisfying than tearing into piping hot sourdough to sop up ladlefuls of creamy clam chowder.

img_20130601_115006
Fisherman’s Wharf, 2013
img_20130601_120257
I still can’t believe we ordered 4 of these! Honestly, 2 would’ve been more than plenty
img_20130601_121802
There’s nothing for it but to pick it up and eat the whole thing!

Our post-lunch walk along Fisherman’s Wharf from Pier 39 to the Exploratorium measured in at a mile, but with a preschooler in tow, that mile felt more like five. Poor guy; with little sleep, a new time zone, and no nap on the horizon, a mile was a lot to ask. We arrived at the Exploratorium on foot in just over an hour–a little worse for wear but without any major meltdowns.

The Exploratorium offers interactive exhibits and multiple explorations in science, art, and human perception. It’s an eclectic mix, falling somewhere between art gallery and science museum with a dash of Brain Games to boot. All I know is we could’ve easily spent the entire day here once we got to playing. The kids loved the interactive physics games and especially enjoyed the Out Quiet Yourself exhibit, a scientific and meditative exercise in walking as quietly as possible across a gravel path against a sound meter.

After five hours at the Exploratorium, we shifted into low gear (literally) to drive down Lombard Street, aka the Crookedest Street in the World. Just as we hit the top of Lombard, though, I glanced back to find all three kids fast asleep. The hubby and I enjoyed the twisty descent alone, letting the kids catch a few well-earned Zs.

img_20130601_175426
The kids might’ve fallen asleep, but the hubby and I enjoyed Lombard Street

Even though I’m fairly sure we consumed our body weight in sourdough and clam chowder earlier that morning, we still managed to put away a golden batch of fish and chips at The Codmother Fish and Chips, an authentic joint run by a lovely British woman with a penchant for deep-fried and delicious. It’s been years since I’ve visited the UK, but this stuff was at least as good as real-deal London fare minus the newspaper cone. We wholeheartedly recommend it!

img_20130601_182204
The Codmother, located just off of Fisherman’s Wharf
img_20130601_182222
I couldn’t resist posting this one: proof positive that I might’ve packed our itinerary a little too full 😀

Not quite ready to head back to Oakland just yet, we splurged on dinner at Alioto’s on Fisherman’s Wharf. Critic reviews may be mixed, but for us, Alioto’s was the perfect mix of charming ambiance, sunset views, and iconic location. And what’s more iconically Fisherman’s Wharf than steaming bowls of spicy, brothy crab cioppino? Watching the sun sink below the horizon, we savored our seafood, thankful for the experience. A short trek over the Bay Bridge took us back to Days Inn, Oakland for the night.

img_20130601_192426
Crab cioppino and sunset at Alioto’s–delicious end to a great first day

Day 2:

Complete with an historic carousel and sand slides for cardboard racing, Koret Children’s Quarter in Golden Gate Park turned out to be an unexpected trip highlight for us! To this day, the kids reminisce about the cardboard slides and intricate rope towers they monkeyed around on. Our resident birder (aka the oldest) spotted his first hummingbird, and we loved the novelty of finding Queen Wilhelmina’s Tulip Garden and neighboring Bison Paddock smack-dab in the middle of the city. If these features sound completely incongruous, it’s because they are–with good reason: Golden Gate Park is HUGE. We’re talking multiple museums, windmills, and bison paddock huge. So when we decided to visit onsite California Academy of Sciences for our youngest, whose only road trip request was to see dinosaur fossils, we figured it might take as long as 15-20 minutes to circle the block. Did I mention it was Free Museum Admission Sunday?

img_20130602_102119
Koret Children’s Quarter, Golden Gate Park
img_20130602_092910
Hangin’ around
img_20130602_091919
They slid here for hours; people often leave their cardboard slides for others to enjoy
img_20130602_100818-1
Historic carousel in the children’s quarter
img_20130602_105631
Tulip Garden, Golden Gate Park

I hear you laughing at our delusion.

After two hours navigating gridlock and the assembled hordes, we finally managed to park and snake our way into the 5-city-block-long line. No exaggeration, we couldn’t even see the museum from where we stood! Still, the line moved quickly, and we were grateful to gain (free!) entrance within an hour. Sadly, a docent informed us that the Academy’s paleontology collection had moved and that their only remaining fossil was the T-Rex displayed in the lobby. Lucky for us, long-term focus was not our 4-year-old’s strong suit, and he was soon enamored of the earthquake simulator and indoor rainforest. We would’ve loved to spend more time at CAS, but it was 2 pm, and we had a 3 hour drive to Fort Bragg ahead of us.

img_20130602_145704
Free Admission Sunday was wonderful, but if you’re pressed for time, it’d be better to visit on a regular day to minimize crowds/traffic
img_20130602_125720
Thank goodness they had a T Rex–made this little guy so happy!
img_20130602_155513
Driving over the Golden Gate Bridge; bidding goodbye to SF

We nixed Point Reyes National Seashore from the itinerary for lack of time (though we will be stopping here to backpack this summer!), tracing Highway 1 to the exclusive coastal city of Mendocino instead. It’s not difficult to understand Mendocino’s appeal: here, wind-ravaged cliffs fall precipitously to the tempestuous Pacific; inland, bucolic hills roll gently toward redwood havens. It’s the kind of drop-dead gorgeous that beckons you like Siren song. It’s no wonder we couldn’t resist succumbing to an off-itinerary hike to Point Cabrillo Lighthouse in pursuit of the bewitching Golden Hour.

img_20130602_192120
Point Cabrillo Light Station
img_20130602_192033
Fort Bragg coast, Point Cabrillo Lighthouse Trail
img_20130712_141426
The light was so beautiful at that hour
img_20130602_191906-1
The fact that there was no one on the trail made it all the more special

There are few things in life I consider magical, but this Point Cabrillo Lighthouse hike made me believe: golden light low on the horizon, crashing waves against lonely, jagged cliffs, a sweet doe that appeared out of the brush to hold our gaze a long moment. With the lighthouse keeper’s lamp aglow in the distance and wildflowers amid tall grasses as far as the eye could see, it was almost as if we’d stepped into a scene from a Thomas Kinkade painting. The dirt was soft, the hiking was easy, and though we never found the actual trail to the lighthouse, we weren’t lost. We were exactly where I’d always hoped we’d be–out there, chasing the dream. img_20130622_231234img_20130602_192346img_20130602_192414

img_20130602_191159
The deer stepped out of the brush right after this shot was taken