Hiking Koko Crater Trail in Honolulu, Hawaii: 1,048 Stairs of Doom

As with all enduring love affairs, my relationship with Koko Crater Trail is both simple and complicated.

It all started back in 2012 with my first Koko Crater summit foray (All tongue-in-cheek, of course; a volcanic tuff cone hardly counts as summit bid fare, I know!). I’d heard veteran hikers’ whispered war stories for years, but the trail was only a mile long. How bad could it be? I thought.

Oh, humble pie!

I’ll spare you the gory details, but suffice it to say I came dangerously close to tossing my cookies over the better part of East Oahu that summer afternoon. They don’t dub Koko Crater “The Stairmaster from Hell” for nothing. With a whopping 1,048 Stairs of Doom scaling 1,200 vertical feet in half a mile, this Honolulu trail certainly lives up to its devilish moniker of pain.

Attempt #2 ended just as poorly as Attempt #1, save for some small measure of consolation in having stopped before gastric distress induced Code Red status a second time around. Dreaded stair #750 had foiled me again! Third time’s the charm, or at least that’s what I told myself as I headed down the mountain (er, cone?)-side, licking my wounds.

Koko Crater had proven a worthy nemesis; I would never make the mistake of underestimating her again. I trained hard. Did Insanity for a month. Hiked with a vengeance. And the next time I returned, I knew the sweet triumph of reaching the top. I must have been grinning like an idiot that final, fateful step because a fellow hiker greeted me with an enthusiastic high-five and prophetic words.

“First time?” he asked.

I nodded, mostly because I was too busy trying to remember how to breathe to actually answer.

He gave me a knowing smile. “Won’t be your last. Koko Head’s addictive.”

I couldn’t have imagined the truth to his statement then, busy as I was trying not to die, but the kind stranger had foreseen my future with Yoda-like sagacity. In the years since, Koko Crater has become my favorite, most-despised workout regime. 1,048 stairs up, 1,048 stairs down. It’s never easy. It’s always hard. I love it. I hate it. And I am hopelessly and utterly addicted.

IMG_20170517_164256
View of Koko Crater from the Koko Head Regional Park parking lot. The faint brown line tracing the left side of the “mountain” is the trail.
IMG_20170517_165326
Stair 1–it’s a big one! Erosion has washed away the underside of the first step, so it’s a bit of a climb but a very fitting beginning. 😀

Koko Crater’s “stairs” are wooden railroad ties, vestiges of an old military railway used to transport cargo to pillbox bunkers during WWII. Over the years, the railroad ties have fallen into despair, and though the stairs are neither sanctioned nor maintained by the state, the trail remains popular with both fitness buffs and visitors alike.

IMG_20170517_165455
You can see the disrepair here; trail angels have added wooden planks and cement blocks for support to many sections to aid hikers on their climb

When hiking, it’s helpful to consider the trail in three sections: 1) pre-bridge, or the first 500 stairs, 2) the bridge itself, comprising 100 stairs, and 3) post-bridge, the final 400 stairs.

Pre-Bridge, the First 500 Stairs

Stair height varies throughout the pre-bridge section, with most stairs measuring a fairly comfortable foot and a half tall. Hikers tend to fall into two distinct camps here: Team Push and Team Pace. Personal experience lands me firmly on the side of the latter (Summit attempts #1 and #2, I’m looking at you), but others prefer to push early-on to compensate for slower post-bridge times. Both strategies yield success, but it’s important to note that the final 400 stairs are significantly harder than the first 600. Post-bridge, the trail steepens dramatically, and railroad ties are fixed at a near 90 degree angle to the mountain. Slow and steady might mean a little ego bruising while other hikers overtake me here, but anything that keeps puking at bay is golden in my book. I’ve watched enough people get sick after the bridge to remember how close I came to doing the same!

IMG_20170517_165617
And…we’re off! Koko Crater Trail, May 2017. Many thanks to my dear friend for humoring me once again with blog photos!
IMG_20170517_165725
Stair height and distance between railroad ties varies with each step. Hard on the lungs and legs, but perfect for conditioning
IMG_20170517_165404
The trail gets busy with the early-morning and after-work rush. It’s quite narrow, too, so stepping off the tracks is the best way to pass or let others pass

Seeking out the 100-stair “markers” that fellow hikers have inked on the railroad rails keeps me motivated…and ever mindful that Stair 300 is where things start getting real. Luckily, there’s quite a view to be had already, equal parts reward and incentive to spur the weary (ie: me) on.

IMG_20170517_170036
Stair 300. Hikers have inked in stair markers in increments of 100 along the railroad ties.


IMG_20120822_112420
View from Stair 300, taken in 2012 summer. With winter and spring rains, Koko Crater is lush and green. Summertime views are more brown and parched like this.

Stair 500: The Bridge (a.k.a. You’re Halfway There!)

Stair 500 brings us to the halfway point: The Bridge. The railroad ties continue here without discernible break, but unlike in the previous section, this portion of rail free-floats 15-20 feet above the ground. While the slats aren’t wide apart enough to fall through, they’re large enough to warrant a broken ankle or leg should you slip. Unfortunately, EMS rescues are not uncommon in this area, and though I’d love to cite that as my reason for skirting the bridge and taking a land detour, who am I kidding? I’m the biggest ‘fraidy cat around when it comes to exposed heights. EMS incidents or no, there’ll be no crossing that rickety bridge for me! Luckily, there’s a side path that skirts the bridge’s entirety, rejoining the main trail just past Stair 600. Here, the railroad ties are firmly rooted to the mountainside again. If you look to the right of the bridge, you will see a well-worn dirt path that wusses like me cling to with gratitude. 😀

IMG_20170517_170934
The rickety bridge–no, thank you! I considered climbing a stair or two to get a better picture, but decided I liked living better. 😀
IMG_20170517_170139
Looking back from the bridge, Hanauma Bay and Hawaii Kai in the distance
IMG_20170517_170136
Looking back towards Hanauma Bay from the Bridge. The view is already pretty great from here, and it only gets better!

Post-Bridge: the Final 400 Stairs of Doom

The post-bridge finale is truly a test of mental and physical fortitude. No matter how many times I complete Koko Crater, Stair 750 always, always vexes me. It’s where I consider throwing in the towel, every single time. Here, the stairs steepen from a 45 degree incline to a daunting near-90 vertical climb. Stair height increases dramatically as well. At 5’3”, I often have to lift my legs 2-3 feet between steps, reverting to all fours to hoist myself up. Time and weather have eroded the gravelly dirt between stairs to well below stair-line, and many of the wooden railroad ties are narrow and broken as well, making for sketchy footing. How’s a girl to get to the top? “Eyes on the prize” is a mantra that serves many well, but I prefer to keep my eyes fixed upon the ground–one stair at a time, one foot at a time–until I’m past Stair 900 and safely past my mental quitting zone.

IMG_20170517_171748
Stair 750 is no joke, and it only gets steeper from here! Take heart, though–you’re almost there!
IMG_20170517_172047
So close and still so far…climbing toward Stair 800. It’s hard to see it here, but the distance between stairs is sometimes 2-3 feet.

But oh, to stand–or collapse, as it were–on the summit! There is nothing more glorious. To experience the beautiful camaraderie found at the top of Koko Crater is to understand the Aloha Spirit indeed. Strangers evolve into friends over fist bumps and high-fives. War stories are shared and commiserated. And always, Koko Crater veterans pay it forward, shouting encouragement to first-timers hundreds of feet below. “Don’t quit now! You’re almost there–push!” is a happy onus to bear.

IMG_20170517_173622
The view from the top, Koko Crater Trail May 2017. That mountain on the distant right is the backside of Diamond Head.
IMG_20120822_104517
The view from the top, Summer 2012. You can see how different the trail and surrounding hills look during the summer.
IMG_20170517_174307
What goes up must come down, and in some ways, going down can be even trickier than climbing up.
IMG_20170517_174628
Side-stepping works well for heading down safely. No shame in my game: I have no pride and will frequently use my hands to keep 3 points of contact on the way down.
IMG_20170517_174633
Heading down Koko Crater Trail with views of Hanauma Bay and Hawaii Kai in the distance.

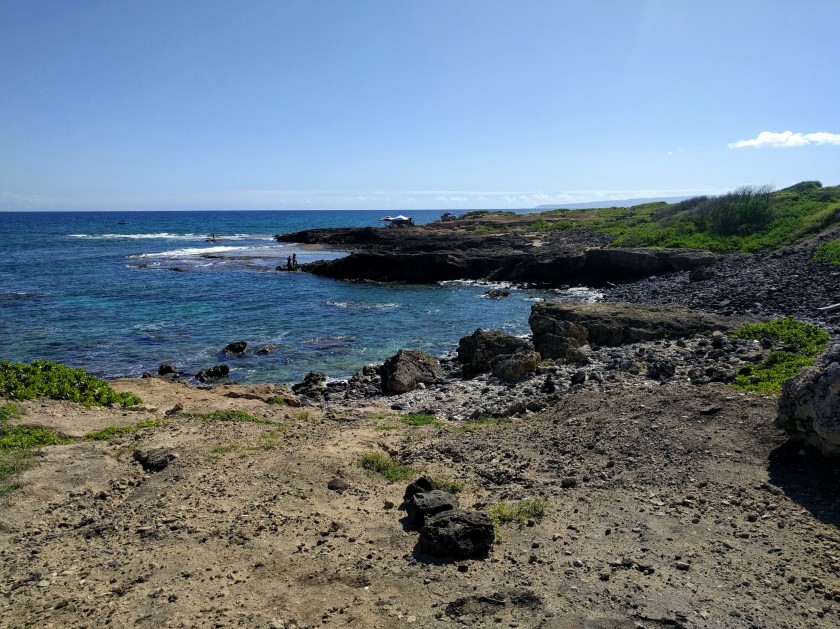
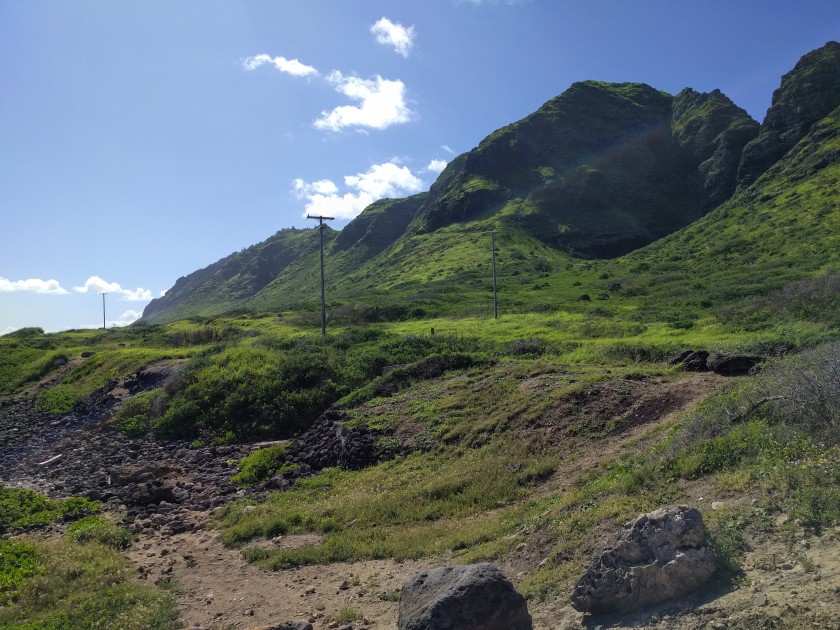
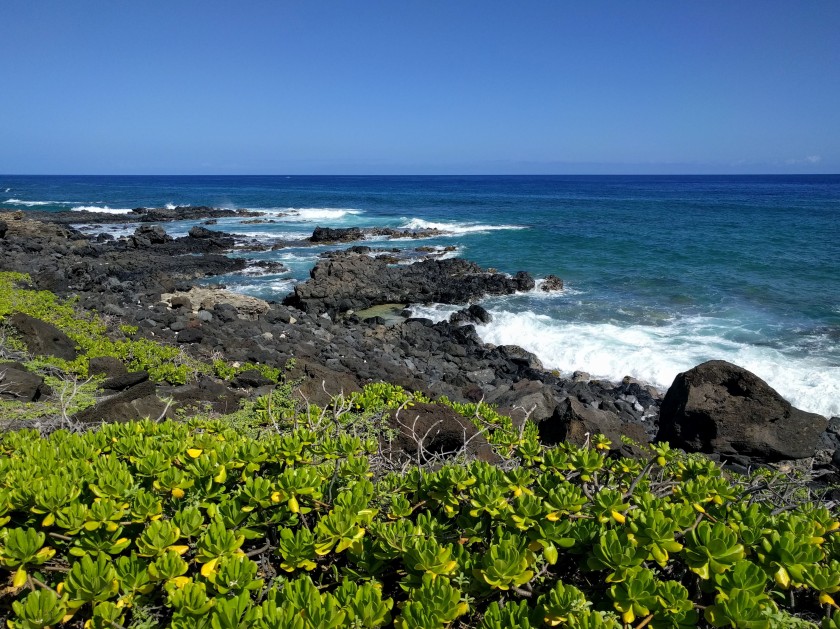
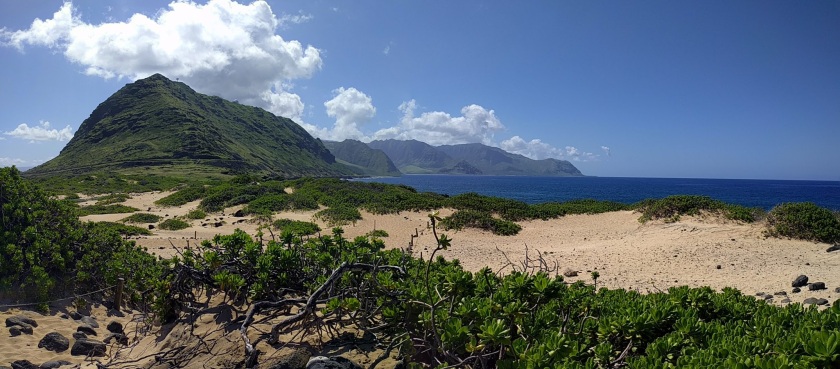
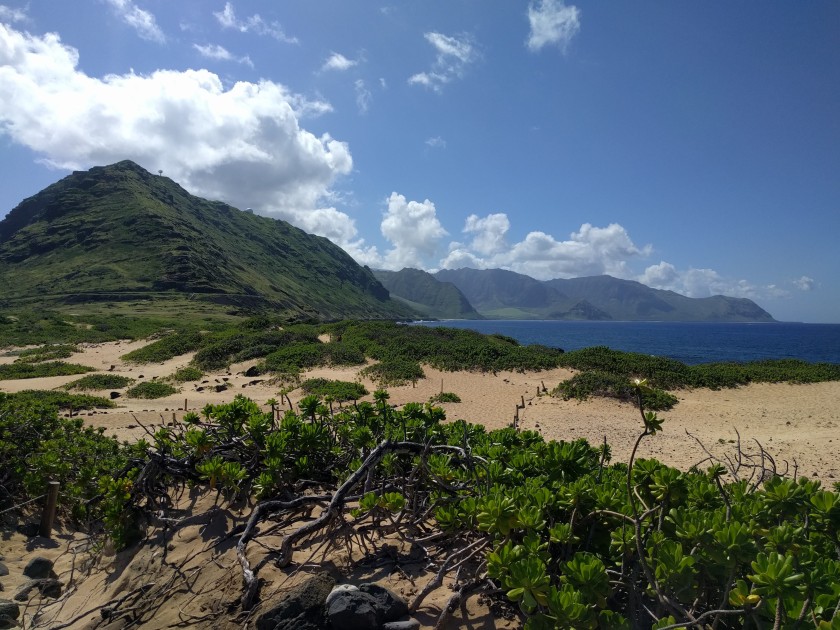
True, Koko Crater’s beautiful views of Hanauma Bay, Diamond Head, and the Ko’olaus are without rival, but I’d venture that the hike’s appeal lies less in its views (delightful though they may be) and more in the singular opportunity to challenge oneself. The stairs demand a unique skillset, delivering circuit training, strength training, and interval training in one convenient and grueling package–gorgeous views simply sweeten the deal. Koko Head’s short mile-long length also lends itself to weekly repetition, a boon to goal-oriented junkies who enjoy quantifying fitness gains. Given our hurts-so-good masochistic tendencies, this quad and glute (and lung!) burner has earned a weekly spot in our training regime. There’s nothing more gratifying than watching recovery times between spurts improve or seeing your time to the summit drop to thirty minutes or less! No matter how many times you claw your way to the top, Koko Crater never gets old. Fitness goals may change and evolve, but the challenge itself? Always there.

1,048 stairs up. 1,048 stairs down. It’s never easy. It’s always hard. Love it and hate it–Koko Crater Trail is the stuff of maddeningly sweet addiction.

Closer to Home: Hiking Ka’ena Point Trail

Not a cloud in the sky–an auspicious phrase, unless you’re hiking Ka’ena Point Trail with 25 pounds strapped to your back.

Then it’s more of a death sentence, though there’s hardly a better way to go!

With our trip a month away, we’ve been hiking twice a week and had planned Ka’ena as a long backpacking training run with our friends this past weekend. Only an hour’s drive from the hustle and bustle of Honolulu, Ka’ena marks Oahu’s westernmost point as well as the end of the road–literally! Spanning the western shore of the island in almost its entirety, Farrington Highway comes to an abrupt halt at Ka’ena Point Trailhead. There’s simply no seeing this hidden part of Oahu unless you’re willing to hoof it, and believe you me: this is a trail you want to hoof.

Between November and May, the sun-baked Waianae coast blooms to life in lush shades of tropical green. Warm waters welcome migrating giants, and on a clear day–which is next to always at Ka’ena–humpback whale sightings can clock in an easy dime a dozen in under an hour. Endangered Hawaiian monk seals sun themselves on sandy beaches while Laysan albatrosses circle the shore, their majestic 7-foot wingspans casting shadows across sand dunes and lava cliffs.   

But Ka’ena is also a land of extremes.

Literally “The Heat,” Ka’ena will make you cry uncle under its scorching midday sun. Heed the posted warnings; Ka’ena is aptly named indeed. You can access Ka’ena Point from both Waianae and Mokuleia, though from Mokuleia, the trail measures a hair longer at just over 5 miles roundtrip. We opted to hike the Mokuleia route as it offers more solitude than its Waianae counterpart; it’s also only 2 miles away from Dillingham Airfield, a safer parking alternative to trailhead parking with convenient public restroom access. While safe and free, parking at Dillingham Airfield added an additional 4.5 miles to our hike, bumping our total to a sweaty but satisfying 9.5 miles. 

IMG_20170507_084029
Walking 2 miles along Farrington Highway from Dillingham Airfield to get to the trailhead. Many thanks to our friends for being such good sports about blog photos!

Our group set out from Dillingham Airfield at 8 am, each hiker laden with 5 liters of water, gear, and a bottle of electrolyte drink. With the sun low on the horizon, temperatures hovered at a bearable 80 degrees, though the day was already shaping up to be much more humid than we would have liked. We followed the highway for two miles, grateful that the paved road made for speedy hiking. We arrived at the trailhead gate a half hour later–a little sweatier under our floppy sun hats, but ready for whatever Ka’ena had to throw our way.

Beyond the gate, hikers must share the trail with any off-road vehicles brave enough to pit their tires against the heavily cratered red dirt and rock “road.” Not to worry, though–there’s no real chance of getting hit. Driving more than 5 miles per hour would be ill-advised here unless flat tires are the desired goal! Still, it’s good to be aware of the possibility of vehicles and plan accordingly. Countless spur trails beckon hikers to the ocean, and though we managed to resist this go-round, their allure is hard to ignore. We’ve been lucky to spot monk seals on hidden beaches and majestic honu (green sea turtles) just offshore in the past. The main trail, in contrast, is decidedly less comely, all red dirt and rocks for miles on end, but I’d argue that its meditative predictability is precisely Ka’ena’s charm.  

IMG_20170507_090300
Follow the endless red dirt road
IMG_20170507_084616
Looking back towards Dillingham Airfield; that hint of green is just a small taste of all the beautiful green to come! On a clear day, you can see for miles here.

To hike Ka’ena Point is to embrace the journey over the destination, and we were fortunate to be treated to some of the best scenery I’ve ever experienced in these parts. Recent rainfall left the Waianae Mountains greener than I can remember, and the sky and ocean melded into a seamless sea of blue. All of that blue, though, translated to little cloud cover for shade, and temps soon spiked at a sweltering 90+ degrees–a sticky, unforgiving heat that left us losing water faster than we could replace it. We slowed our stride to allow our bodies a chance to cool.

IMG_20170507_090759
I’ve never seen Ka’ena so green! In a few months, this area will be parched and brown.
IMG_20170507_091827
We didn’t follow this spur path all the way down, but you can see people fishing off lava cliffs in the distance
IMG_20170507_091954
Stopping for a water break and admiring all the blue and green. And look! There’s even a mini-rainbow against the mountains!
IMG_20170507_093814
We didn’t see any whales this time, but the water is so calm here–ideal for whale watching

At the 5 mile mark, we came upon a cacti and sisal “forest” that preceded our turnaround point–Ka’ena Natural Area Reserve, a wildlife sanctuary established to protect nesting wedge-tailed shearwaters and Laysan albatrosses. Cordoned-off footpaths meander the birds’ burrows, allowing visitors an up-close view of these large and fascinating seabirds. Unfortunately, we arrived at the tail end of nesting/migration season, so stragglers numbered few and far between. During the winter, however, visitors may see hundreds of nesting albatrosses circling and diving for fish–quite the spectacular sight! Equally impressive is the expansive and rugged relief of the Waianae mountains to the south of Ka’ena point, hidden from view until you reach the lighthouse. In a sprawling metropolis like Honolulu, I’m thankful that there are still pockets of untamed wilderness like this to be found–miles upon miles of unsullied blue and green, the way Hawaii was meant to be. 

IMG_20170507_092459
Flowering sisal, a type of agave plant. These guys are huge! They towered over us.
IMG_20170507_092843
Looking back from the Sanctuary gate
IMG_20170507_093416
Entering Ka’ena Wildlife Sanctuary
IMG_20170507_094741
Laysan albatross; they’re so much bigger than they seem here. They’re so huge that their wings cast noticeable shadows when they fly overhead
IMG_20170507_094727
Laysan albatross nesting in the sand dunes
IMG_20170507_101941
I spy an albatross nesting in the grass

Tempting as it was to linger under the shade of the lighthouse tower, it was already 10:30 am. The 90 degree high we’d noted earlier would rise within minutes as temperatures continued to climb. We hoisted our packs–a few pounds lighter now thanks to some serious water guzzling during our break–and headed back to the trailhead. Scorched arms and sweat-drenched shirts hastened our pace. In spite of slathering SPF 50 on every square inch of skin just two hours earlier, it was clear we were beginning to resemble broiled lobster. The time for admiring views had passed; we needed to get out of the sun and quick.

IMG_20170507_093822
The final stretch before the lighthouse tower. Nothing terribly exciting, but then you turn the corner, and….
PANO_20170507_094813
This is what’s hiding on the other side! Beautiful, untouched blue and green
PANO_20170507_095538 (1)
Ka’ena Point–the westernmost tip of Oahu. It was so hard to leave this view!
IMG_20170507_095352
Soaking in the view at Ka’ena Point before heading back to the trailhead. It doesn’t get much better than this!
IMG_20170507_094628
The view from the lighthouse tower at Ka’ena Point
IMG_20170507_102804
Heading back to Dillingham Airfield

It was such a relief to reach the trailhead! Free of the Ka’ena inferno, sea breezes made for tolerable temps. But out of the frying pan and into the fire, as they say: where ocean breezes offered blessed relief, our achy feet were definitely worse for wear. Though not our first training hike, this was the heaviest weight we’d practiced with this month. Coupled with the 11 am heat, my feet were suffering Honolulu Marathon flashbacks (for reference, a one-and-done stint). 😉

Conversation took a back seat the last two miles, each of us digging deep to gather some inner resolve for the final push. Food fantasies have always done the trick in this past, and thankfully, this time was no exception. ‘AC and plate lunch’ became the mantra that got us back to the car, and boy, did Loco Moco Drive-Inn ever deliver! With an abundance of AC, good friends, and good eats, mochiko chicken plate lunch* never tasted as delicious as it did that day. Come for the hike and stay for the food–Ka’ena Point will leave you hooked.

*Local-style “plate lunch” is comfort food in Hawaii. 2 scoops of rice, a scoop of macaroni salad, and some type of gravy-covered or Asian BBQ meat is standard plate lunch fare. Smothered-in-brown-gravy-or-soy-sauce is a popular option, though many places (like Loco Moco Drive Inn) now offer low-carb plates, substituting tossed salad for the rice and mayo-heavy macaroni salad. My favorite option of all is the mini plate lunch–with 1 scoop of rice, 1 scoop of macaroni salad, and half the meat of a regular plate, it’s just decadent enough to sate hiker hunger and feel like a treat!          

Closer to Home: 3 Unforgettable Stops in East Oahu

So often, I find myself wistful whenever I browse through travel magazines and social media sites. Summit selfies and lakeside camp photos stir a longing in me that makes me wish I was anywhere but here. Thing is, here is a pretty darned great place to be–a fact I too often forget. More importantly, now is the moment I want to be in–and the only one we’re guaranteed. I’ll get back to the Olympic National Park and Seattle portions of our trip soon, but I wanted to pause for a bit to pay tribute to the humble backyard adventure.

To be honest, I guess I’ve been feeling a little burned out. Kids, work, activities–nothing new or out of the ordinary, but lately, it’s all been feeling like a bit much. I thought a little extra sleep might help. Or that maybe I needed to cut back on a weekend activity or two. Still, the feeling persisted. Then I walked past a Crayola-colored worksheet hanging on my son’s door–I am a Bucket Filler!–and it hit me.

I haven’t been filling my bucket.

Oh, I had a million excuses–kids, work, money…life–but the truth was, I’d let my bucket run dry. I count my blessings that we’re able to vacation most years (and these fill my bucket in a big way), but vacations can’t be expected to sustain you indefinitely. In neglecting to tend to my personal happiness, I’d lost sight of the everyday wonder in the here and now. I knew I needed to remedy the situation and was lucky enough to have 4 days off from work this week to do just that.

It didn’t take a lot of money–less than $20 for the entire week–and time was limited, with kids and activities to tend to. But it’s amazing how far you can stretch $20 and a few hours a day with simple pleasures. I sipped coffee and people-watched in a coffeehouse. Lay on the sand and watched the sun rise. Hiked in meditative solitude. Watched a movie (Queen of Katwe, which was excellent!) and shoveled a ridiculous amount of buttered popcorn. Slurped pho on a lunch date with my husband. Most of all, I watched waves crash over and over and released a breath I’d forgotten I’d been holding for months.

My favorite bucket-filling backyard adventure of the week was an excursion along the eastern coast of the island. Should you ever find yourself on Oahu, I highly recommend escaping the hustle and bustle of Waikiki and planning a day trip out east.

Stop 1: Sandy Beach and Makapu’u

Begin the day with sunrise at Sandy Beach, and prepare to be dazzled by early-morning surfers as they put on an electrifying show. img_20130910_132552

img_20130910_154959_1
Sunrise at Sandy’s–an unforgettable experience

Drive up the coast a mile or two and hike out to Makapu’u Lighthouse. More of a gentle stroll than a hike, there’s no better view to be had for less effort. Crowds are minimal on weekdays, allowing you to connect with your surroundings. I walked Makapu’u twice this week, meandering down a path toward lava tidepools and taking a spur trail near the entrance toward Ka Iwi Scenic Shoreline. I considered hiking Koko Head instead (a monstrosity of 1,000+ railroad track “stairs” that I will post about another time), but there is a time for challenge and a time for being gentle with yourself, and this trip was definitely the latter. Near the top, I scanned the horizon–no whales today, though they will return soon enough–and savored the views of Rabbit Island and Molokai in the distance. At less than two miles, you can easily walk this paved path in under half an hour, but lingering is what truly makes this trail memorable.

20161013_091048_richtonehdr
Backside of Koko Crater and the Ka Iwi Coast
20161013_091013
Looking back toward Koko Head
20161013_085821_richtonehdr
Makapu’u Lighthouse
20161013_085915
View of Rabbit Island from Makapu’u Lighthouse overlook
20161013_090015_richtonehdr
Views of Waimanalo and beyond

Stop 2: Halona Beach Cove

After Makapu’u, I headed back along scenic Kalanianaole Highway toward Halona Blowhole. This lava tube-meets-ocean attraction is on the radar of every tourist and guidebook on the planet, and for good reason: it’s spectacular. I jockeyed for parking with the endless parade of tour buses streaming into the parking lot and then escaped the crowds via a rock “staircase” that leads to the secret beach cove featured in From Here to Eternity and Fifty First Dates. To be sure, this “secret” is not much of a secret at all, as you can certainly see the beach from the overlook. However, in comparison to the number of people at the overlook, relatively few people venture down because of posted danger signs. The danger signs are no joke–the current is powerful here, and diving from lava rocks into rough ocean is not something I would advise. However, from a lone perch high atop the black lava rock, there is no better spot to admire Halona Blowhole as it hurls churning ocean water 30 feet into the air. I sat here for close to an hour, watching green sea turtles drift in and out of the cove. I wandered into a cave tunnel at the foot of the lava wall and felt my bucket overflow with the incoming tide.

20161013_094342_richtonehdr
The steps down to Halona Beach Cove
20161013_094549_richtonehdr
Beautiful blue-green water…be sure to admire from a distance
20161013_095609
There she blows! Halona Blowhole
20161013_100627_richtonehdr
From inside the cave tunnel

Stop 3: Lanai Lookout

From Halona, I drove less than a mile to Lanai Lookout. A favorite of fishermen and tourists alike, Lanai Lookout doesn’t draw quite the same crowds as Blowhole, or maybe it’s that it draws a different type of crowd–quieter, more contemplative. Whenever I’ve found myself in need of quiet reflection, Lanai Lookout has always delivered. This trip was no different. I sat alone along the sea cliff and listened to the roaring surf pummel the coast. Tracked not one, but two ‘iwa (great frigatebirds) overhead, giant wings splayed a magnificent seven feet wide. Soon enough, it would be Monday. Soon enough, it’d be back to work and the familiar grind. But for now, I’ll savor the sun on my shoulders and the hot Kona coffee in my belly. Breathe in the salty ocean air and trace the smooth lava rock beneath my feet. Refill my bucket with the thunder of every crashing wave. Because this moment–the one before me right now? This moment is everything.

20161013_102646_richtonehdr
The ocean is mesmerizing here
20161013_102547
My favorite view of Koko Head and Kalanianaole Highway
20161013_102352_richtonehdr
Pounding surf at Lanai Lookout
20161013_103057_richtonehdr
Oahu’s eastern shore, as seen from Lanai Lookout

Gear Review/Makapu’u and Kuliouou Trails

Our road trip is two weeks away, and we’ve been having fun testing out new gear on recent hikes. I can (and have!) spent hours scouring REI and Backcountry, marveling over the countless backpacking/camping gadgets for sale, dreaming of all the possibilities. In the end, though, reality (i.e.: that darned budget) dictates limiting actual purchases to what we really need as a family instead of those fun-to-dream-about wants.

With only 3 backpacking packs in our possession, backpacks topped our list of needs this year. Luckily, there was an REI Anniversary Sale and member dividend that was burning a hole in my pocket to save the day! We were able to score an unbelievable deal on a 2015 Osprey Kyte 46 and REI Passage 38.

20160613_152140
Osprey Kyte 46, jacket in the front mesh panel, separate sleeping bag compartment with integrated rain fly just above.

I’m not big on brand name items, but I couldn’t ignore the Kyte’s glowing reviews–or Osprey’s stellar lifetime guarantee. And call me shallow, but I adore that beautiful teal! One of the features I like best about the Kyte 46 is the external hydration sleeve. It can be a hassle to load/unload a hydration bladder from a filled pack, and this back access compartment eliminates that problem. The hip belt and load lifter straps are so smooth and easy to adjust with the pack on–one of many areas where Osprey’s commitment to quality is very evident. The fully adjustable harness and LightWire Frame technology ensures a custom fit and comfortable carrying experience. I love the roomy hip belt pockets that allow easy access to snacks and a cell phone, and the multi-zippered brain compartment that enables easy organization of frequent-use items.

20160613_152238
Spacious zippered side pockets–each pocket can accommodate a sleeping pad, fleece pullover, and backpacking pillow.

The front mesh panel stretches to accommodate a rain jacket, and the side mesh panels can easily accommodate a Nalgene bottle each as well. The zippered vertical side pockets might be one of the Kyte’s best features. What the main compartment may lack in size is more than made up for by these spacious side pockets. I’ve stuffed a sleeping pad, pillow, and adult-sized fleece pullover into ONE pocket, with room to spare. There is also a sturdy shoulder loop for quick and easy trekking pole storage/access.

20160613_152350
Roomy hip belt pockets, external hydration sleeve, stow-and-go trekking pole loop, multi-zippered brain compartment; Osprey Kyte 46.

With an integrated rain fly and separate-access sleeping bag compartment with floating divider, the Osprey Kyte 46 is perfect for overnight or 2-3 day backpacking trips. It can also be easily compressed and cinched for longer day hikes, making this a pack we’re sure to put to great use for many years to come.

With two girls in our family, we’ve had our share of unpleasant hiking bathroom experiences. Without going into too much detail, let me just assure you that the pStyle is a GAME. CHANGER. If you are female and you enjoy spending time outdoors, you need a pStyle. To be fair, there are cheaper silicone versions of the pStyle that I have not tried, but reviews on Amazon suggest that these imitations are less predictable, leaving room for error–definitely not a good thing (or look–shudder!) when you’re backpacking with only one pair of pants. The pStyle, however, is discreet, fail-proof, light, and compact, earning its spot as a must-have item in our backpacks this year.

With 8 nights of backpacking on the itinerary , compact cookware and mess kits were high on our list of priorities. Combining every Walmart gift card we’ve received over the past few years, we were able to nab this GSI Outdoor Pinnacle Camper cook set absolutely free! At 3 pounds 11 ounces, it’s not the lightest kitchen set-up for backpacking, but since the weight accounts for cookware and mess kits for 5 people, it works perfectly for us. One of the features I love best about this kit is how everything nests into one compact 9 inch by 5 inch package, making it suitable for flying, too, where space is at a premium.

20160613_152623
GSI Outdoors Pinnacle Camper cook set; everything nests in this compact 9″ x 5″ matryoshka-like system.

With a 9 inch frypan, 3 L pot, 2 L pot, and 2 strainer lids, the non-stick hard anodized cookware easily accommodates families or larger groups. The set comes equipped with 4 plates, 4 insulated mugs, and 4 bowls, and everything nests into a stuff sack that doubles as a welded sink in the backcountry!

20160613_152940
Full-size cookware (3 L & 2 L pots w/ strainer lids, 9″ frypan), plates, insulated mugs, and bowls for 4, welded sink carrying case.

If I had any complaints, it would be that the plates are not especially deep or made of high quality material, but that’s minor in the grand scheme of things. I love having full-sized pots and pans with backpacking convenience and integrated mess kits in the GSI Outdoors Pinnacle Camper cook set.

To complete our mess kit (the GSI cook set serves 4), we cashed in a Sports Authority gift card and took advantage of a 30% off closing sale to nab this Light My Fire MealKit 2.0 for free! With 3 plate/bowls and 3 lids that can double as eating vessels, this kit contains more bells and whistles than we’ll need, but it’s great to have those options for future trips. The MealKit 2.0 also comes with a spork, pack-up-cup, and cutting board/strainer for cooking.

Closer to Home: Recent Hikes

Makapu’u Lighthouse Trail

Makapu’u Lighthouse Trail is a popular and easy 2 mile “hike” along paved road, offering stunning views of Oahu’s southeastern and Windward coasts. From the parking lot, the paved road steadily climbs 500 feet, allowing easy access for strollers, wheelchairs, and those with mobility issues.

20160607_105425
Paved road along Makapu’u Lighthouse Trail
20160607_105900
Looking back from whence we came: parking lot in the distance
20160607_105417
Koko Crater and Ka Iwi Scenic Shoreline

Recent additions of rest benches and viewing areas make this a great beginner hike, and there is no spot more beautiful than Makapu’u for whale watching during whale season (November to May). Although the lighthouse itself is not accessible to visitors, we’ve been lucky to see dozens of whale spouts and breaches during whale season here. Located on the eastern side of Oahu, this hot and dry trail is also a prime location to watch the sun rise. The only con to this hike is that its popularity translates to large crowds; arriving after 10 am means circling for parking and sharing the trail with a hundred or more hikers. Don’t let that stop you, though–this hike is a beauty, and despite the crowds, we do this one at least 5-6 times a year!

20160607_111126
View from the top, Makapu’u Lighthouse Trail
20160607_111119
View of Rabbit Island, aka Manana (State Seabird Sanctuary); I don’t recommend sitting that close to the edge!
20160607_110845
A patch of pink among the cacti and brush; pillbox in the distance
IMG_20120714_095331
3 short years ago…boy, time flies!

Kuliouou Ridge Trail

Kuliouou Ridge Trail is a 5 mile out and back hike that ascends 2,000 feet to summit the Ko’olaus. Families should plan on spending 4-5 hours hiking this trail at a moderate pace. Although this is a moderately difficult hike composed primarily of switchbacks, rain can render the steep slopes muddy and challenging.

20160612_115126
Slippery, muddy stairs about 15 minutes from the top, Kuliouou Ridge Trail

Exercise extreme caution, especially with children. With all the recent bad weather, we had a few near-mishaps this past weekend. There are several long and steep rock/tree root scrambles in the second half that can become quite treacherous when coupled with mud. (No pics, unfortunately; was too busy trying not to die!) I should have known better than to push this hike in the rain, and we nearly paid the price for it. It is worth your family’s safety to wait for several days of clear weather before attempting this hike. That said, this hike is an absolute must-do! We huffed and puffed through the 2,000 feet of elevation gain, and the last 30 minutes of steep mud puddle stairs were thigh burners, but hiking in the clouds made everything worthwhile. Unfortunately, the bad weather didn’t make for great views.


20160612_114349
End of Trail, Kuliouou Ridge Trail
20160612_114325
Clouds and fog at trail’s end, Kuliouou

However, the fog and clouds lifted for a brief minute, and we were able to get a glimpse of the glorious views Kuliouou is known for.

20160612_114723
View of Waimanalo, Kuliouou Ridge Trail
20160612_114802
View of Koko Head and Hawaii Kai
20160612_114540
Glimpses of green and turquoise below, Waimanalo
20160612_114608
Stopping for well-earned spam musubi and gummy bears at trail’s end.

Having hiked Kuliouou during clear weather, I can tell you that the views of Hawaii Kai, Waimanalo, and Lanikai from the top can’t be beat. If you’re looking for a challenging workout, ever-changing scenery, and stellar views, Kuliouou Ridge Trail is the hike for you!

Closer to Home: Lanikai Pillboxes Hike

Summer’s here! The blog has been quiet as of late, but with school and the kids’ extracurriculars finally behind us, we’ve been focused on prepping for our Glacier/North Cascades/Olympic trip (we leave in three weeks!). Maps are being compiled; lists are being checked twice. With the bulk of our itinerary leaning toward backpacking this year, it’s also crunch time for conditioning. This weekend’s fun and easy training hike was Lanikai Pillboxes.

Lanikai is renowned for its beautiful beaches.

IMG_20130908_062856
Sunrise, Lanikai Beach 2013

Media outlets like CNN have named it the most beautiful beach in the US, and though I haven’t traveled enough to say for sure, I can certainly vouch for Lanikai’s beauty. Located on the eastern side of Oahu, Lanikai’s fine powdery sand and pristine turquoise waters make it one of the best sunrise spots on the island. But Lankai has another great attraction that I love as much or even more than the beach: the Lanikai Pillboxes hike, a.k.a. Kaiwa Ridge Trail.

This 1.6 mile out and back hike begins across the Mid Pacific Country Club near a private driveway on Kaelepulu Drive.

IMG_20160604_165830
Beginning of the trail, Lanikai Pillboxes

The trail begins with a steep incline; there are trees and ropes along the chain link fence to assist with the climb, though they’re probably not necessary for most. Sadly, litter and pet waste makes this area less than appealing, but not to worry–better sights and smells await.

IMG_20160604_165817 - Edited
Hold your nose and climb fast, Lanikai Pillboxes
20160604_165909
The beginning of the trail is a little steep, Lanikai Pillboxes

After a short climb, you arrive at a plateau that overlooks Lanikai Beach and the Mokulua Islands just offshore. Behind you are sweeping views of Mokapu Peninsula (Marine Corps Base of Hawaii), Flat Island, and Kailua Beach.

20160604_170408
Lanikai Beach and Mokulua Islands
20160604_170353
MCBH, Flat Island, Kailua Beach

From here, you can visualize the first pillbox in the distance and the rocky trail that follows the ridgeline to get you there. The trail gains over 550 feet in under half a mile, but the short distance makes the steepness doable for families with young children. With a little persistence, it’s possible to make it to the first pillbox in 20 minutes, and there are many places to stop and catch your breath along the way.

20160604_170454
The 1st pillbox is that black speck at the top/center of the photo
IMG_20160604_174451
Looking back

The trail diverges in several spots–traversing the top of the ridge and contouring it in other areas–but rest assured that all spur trails lead to the same destination.

20160604_170823
Follow the ridgeline to get to the first pillbox (far left)


IMG_20160604_170642
Along the ridge, overlooking MCBH

Once you arrive at the first bunker, take a moment to admire the view. We were there just before sunset, and there were several groups situated atop and inside the pillboxes, waiting for the sun to go down.

IMG_20160604_172525.vr
View from the first pillbox, Lanikai

Early morning hikers often find themselves vying for space here as it’s a popular spot for sunrise photography as well. As documented in my Bryce horseback debacle, I’m not keen on heights and ledges, so I opted to stay firmly on the trail here. 🙂 The boys, however, climbed atop the pillbox with my husband.


20160604_173934
The first pillbox. The boys climbed up here and made mom verrrry nervous.
20160604_174441
View from the ground, first pillbox, Kaiwa Ridge Trail

Many hikers opt to turn around here, but a short 5 minute walk further up the ridge takes you to the second pillbox–and a breathtaking view of the Ko’olau Mountain Range in all its verdant, crenulated glory.

IMG_20160604_174233.vr
View of the Ko’olaus and Mokulua Islands (photo credit to the hubby)
20160604_174307-PANO
View from the second pillbox, Lanikai
IMG_20160604_170410.vr
Lanikai neighborhood as seen from Kaiwa Ridge Trail

From here, you can follow the undulating ridge for another 20-30 minute; the trail eventually descends into a neighborhood about a half mile from the trailhead, but we opted to retrace our steps instead. The sun was just beginning to set, and we were treated to cool tradewinds and an entire hillside of night-blooming cereus readying for evening bloom. Night-blooming cereus is a tropical cactus flower that blooms in the evening and wilts by dawn.

IMG_20160604_172306
Night-blooming cereus, Lanikai Pillboxes (photo cred to the hubby)

All in all, this short and sweet hike is one that I would highly recommend. It packs mega scenery for minimal sweat, showcasing stunning Windward views of the island. Tell me: have you hiked Lanikai Pillboxes? What’s your favorite Hawaii sunrise or sunset spot?

Tips for families hiking Lanikai Pillboxes with young children:

Plan to hike on weekdays, if possible

The trail can get crowded, especially on the weekends.  We finished the trail fairly late (6:30 pm), and there were still large groups of ten or more arriving to hike as we left. Weekdays are less busy and tend to be more pleasant.

Use the bathroom beforehand

There are no bathrooms at the trailhead, so plan accordingly. The nearest public restroon is located at Kailua Beach Park, 5 minutes away.

No parking near the trailhead

No parallel parking is allowed alongside the Mid Pacific Country Club. Your best bet is to park in the surrounding neighborhood, but be advised that parking can be difficult to find because of the new restriction against parking in the bicycle lane. Resist the temptation to park illegally–parking in a restricted area will result in an outrageous $200 flat fine! Instead, circle the Lanikai loop patiently–you’re sure to find something quickly, as visitors are always arriving and departing from the beach.

Apply sunscreen and avoid hiking midday

The Hawaii sun can be brutal if you’re not properly prepared, especially on an exposed ridge hike like this one. Good sun safety makes for a pleasant and comfortable hike.

Wear proper hiking shoes

Many tourists attempt this hike in flip flops and sandals. I’m sure it can be done, but as the trail is mostly slippery rock and gravel, shoes with proper traction are key.

Avoid hiking during or after rain

Again, the trail is steep and challenging in certain areas. Mud and wet rock only exacerbates these difficulties and makes for a sketchy hike. We saw two adults slip and fall this weekend, and the trail was bone dry. Keep little ones safe, and be sure to limit hiking to good weather.

IMG_20120928_182632
Sunset, Lanikai Pillboxes last year
IMG_20121004_173514
Sunset, Kaiwa Ridge trail