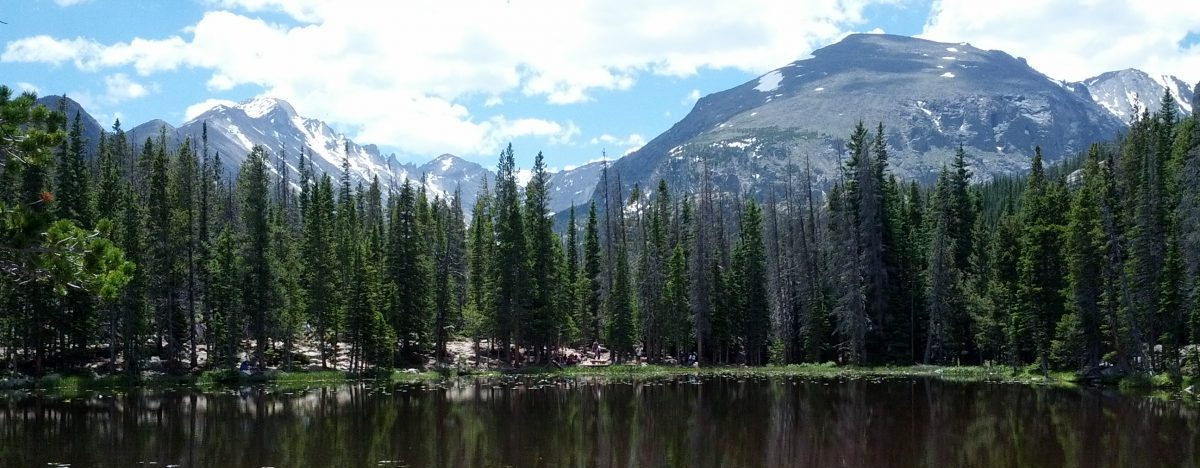
There are so many reasons we’re looking forward to this year’s National Parks road trip. As we get ready to leave, here are 21 of them:
Seeing a mountain goat on the Highline Trail in Glacier National Park.
Getting our caffeine fix at Storyville Coffee in Pike Market.
Storyville Coffee, 2014…most amazing coffee ever!
Celebrating the 4th of July from a backcountry site on Ross Lake, North Cascades.
Hiking Piegan Pass or Grinnell Glacier trail to see the glaciers before they disappear from Glacier National Park for good.
Eating ALL THE THINGS in Pike Market.
Sunset over Pike Market, 2013
I can’t remember whether the ricotta/lemon curd crumpet is better than the pesto/tomato/parmesan combination, so ordering them both again is clearly the only solution.
The Crumpet Shop, Pike MarketBlackberry ricotta crumpet, Pike Market, 2013
Piroshkies are also high on the list of must-eat-again, as well as char siu sticks from Mee Sum.
Piroshky Piroshky, Seattle, 2013
And amandine croissants from Le Panier.
Amandine croissant from Le Panier, Pike Market
And seafood chowder from Pike Chowder. And so on and so forth. You get the idea. 🙂
Hiking through the wildflowers on the Cascade Pass/Sahale Arm trail.
Backpacking in Hoh Rainforest, one of the largest temperate rainforests in the US.
Catching a sparkly vampire in Forks, WA…or a werewolf along the beach in La Push.
Hiking and camping along the longest natural sand spit in the US, Dungeness Spit.
Driving what National Geographic dubbed “one of the most scenic drives in the nation,” Going-to-the-Sun-Road in Glacier. So grateful that they finished snow plowing for the season; I was hoping we’d be able to do this drive.
Backpacking to Toleak Point (Olympic National Park) with my brother, who lives in Seattle.
Antelope Canyon 2012; I’ve had some fun road trip adventures with this guy! We don’t get to see each other often..happy to be able to spend some time with him.
Hiking to Iceberg Lake in Glacier National Park…and painting the scene with icy lake water.
Tidepooling at Shi Shi Beach at sunset, Olympic National Park.
Linguine alle vongole at Pink Door, Seattle.
Linguine alle vongole, Pink Door, Seattle 2014. This stuff was to die for!
Paying our respects at the Japanese Internment Memorial on Bainbridge Island.
Soaking in the Ladder Creek Falls light show in North Cascades at night, then backpacking across Ross Dam to Big Beaver the next morning.
Playing with nostalgic toys at the Museum of History and Industry’s ‘Toys of the ’50s, ’60s, and ’70s exhibit.
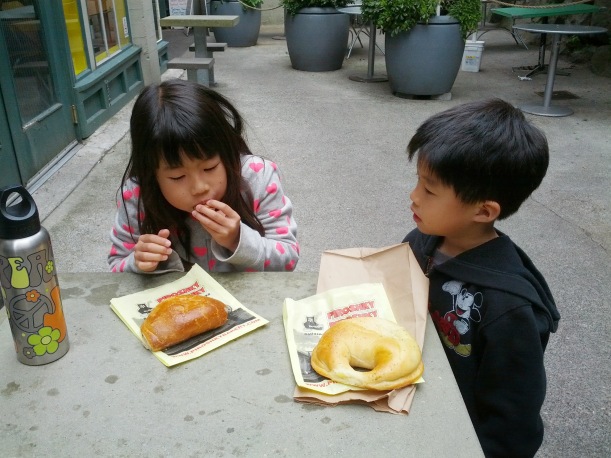
Sugar rush at Top Pot Doughnuts, Seattle. And Krispy Kreme!
Top Pot Doughnuts, Seattle 2013
No Krispy Kreme on Oahu means an embarrassingly large doughnut order for this Hawaii girl every time we visit!
Riding the ferry from Bainbridge to Seattle, a la Grey’s Anatomy.
Stargazing from our tent in St. Mary, Glacier National Park.
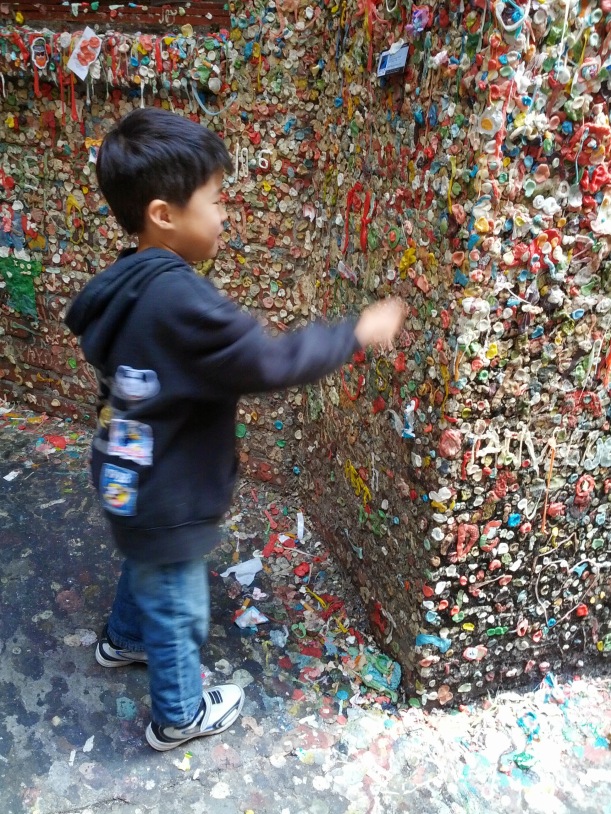
Paying homage to our 2013 addition to the ABC Gum Wall.
ABC Gum Wall, Seattle…there’s not enough hand sanitizer in all the world to undo the ick factor here. Truly.
We can’t wait to get started on this list! If you have any suggestions, tips, or advice for Glacier, North Cascades, or Olympic National Park (or anyplace else on the list), we’d be most grateful for any insight you’re able to provide. See you in three weeks…Happy Travels, all!
Keeping a travel journal is one of the best vacation souvenirs you can give yourself. So often, we come home from trips with T-shirts and postcards that are quickly discarded or forgotten, but a travel journal is the gift that keeps on giving. I can’t tell you how many times we’ve leafed through old journal entries, exclaiming, “Hey, do you remember that artist we met in Arches?” or “Wasn’t that cherry pie at Capitol Reef the best?” Travel is inspiring, and done right, travel journals can serve as wellsprings of inspiration for years to come.
Keeping a travel journal doesn’t have to be intimidating. There are no hard and fast rules; your journal can be as simple or elaborate as you’d like. The only requirement is that you start and maintain it. Your future self will be so thankful that you did! Here are 7 tips to help you get started on your travel journal today.
1. Pick a journal (and writing implement) that inspires you.
Whether it’s a composition book, leather diary, or specialty tablet from Barnes and Noble, find a notebook that inspires you. Your journal is a form of personal expression, and that process begins with the notebook you select. Pay attention to form and function: size, texture, and design should weigh into your decision. What kind of conditions will you be traveling in? Activities like backpacking will require a sturdier notebook than hotel travel. Personally, I love large, plain hardcover Moleskines or dotted Leuchtturm 1917 notebooks. Both of these notebooks hold up well to a variety of media and have expandable pockets on the back cover that are perfect for collecting ephemera. You’ll know you have the right notebook when you feel yourself itching to write in it. Some people prefer a new notebook for every trip, while others, like me, prefer keeping one journal across multiple trips. Choose the system that works best for you.
Moleskine pages lay flat–a feature I love. Plain pages are my personal preference, but you might prefer lined, squared, or dotted paper instead.
2. Start writing in your journal before you leave.
Get rid of dreaded first-page syndrome by breaking in your journal before you leave. I’m guilty of letting beautiful notebooks languish for years for fear of not having anything “worthy” enough to write. Don’t be so precious with your notebook that it never gets used! If you’re too nervous to dive right into your thoughts and feelings from page 1, try numbering your pages instead or creating a Table of Contents. Or use those first few pages to scribble your itinerary. The point is to write something. The act of writing ensures you’re not faced with the prospect of a blank canvas when you arrive at your destination. If you’re too busy packing before you leave, you can use your plane or drive time to break in your journal. This also gets you in the habit of writing, which is key to regular journal maintenance.
3. Vary your writing.
Journaling needn’t equate to pages and pages of diary-style recounting. Your future self probably won’t be interested in a dry, chronological recounting of every meal you ate or every gas station you stopped at, either. Make journaling fun by giving yourself permission to skip the mundane. Write about the interesting details you’ll want to remember ten years from now! Was your concierge a kooky character? Did you have an unexpected bear encounter on the trail? Don’t limit yourself to sentences and paragraphs, either. Give yourself permission to write lists and short bullet points. Where a five page entry might seem daunting, a quick list can be easily written in a few short minutes and can serve just as well in summing up the day’s highlights.
Journal entry for Yellowstone, 2015. Quick lists can be just as effective at imparting key details as lengthy paragraphs.
4. Explore other forms of creative expression.
I’m no artist–not by a long shot–but I’ve come to love watercolor sketching in my travel journal. There have been so many times I’ve taken a million pictures of a destination, only to come home and puzzle over those same pictures, wondering where we were or what it is we did there. Sketching a location, however, has a way of burning that moment into your memory in a way that no photo ever could. It requires you to be present, completely in the moment; it forces you to seek out details you might otherwise not have noticed. In the end, it doesn’t matter if your sketch looks nothing like the location you’re drawing (you can always take a picture to supplement)–what matters is your association of the sights, sounds, and feelings you had when you sat to draw. When I look at this sketch from Lakeshore Trail in Grand Teton National Park, I remember the way the sun felt on my shoulders after our chilly morning float trip, the way the water sparkled, the deep blue and maroon colored pebbles that dotted the shore. I recall the otter family offshore and the osprey nest we watched for an hour while my youngest created small driftwood sculptures on the sandbar. These memories were ingrained by the very act of sketching itself. A picture can truly be worth a thousand words.
Journal entry from Grand Teton National Park, July 2015
The Sakura Field Sketch Set is my favorite watercolor set. Sakura Pigma Micron pens are waterproof, fade resistant, and provide archival quality ink for completing sketches. If watercolor sketch is not your cup of tea, perhaps you’d prefer colored pencils. Or oil pastels. Or charcoal. There are so many options out there; one of them is bound to resonate. Color adds another layer of interest to your travel journal, so don’t be afraid to branch out from the ordinary! Experiment with drawing maps, people, objects, and landscapes.
5. Vary your formatting.
We’ve become so accustomed to writing from left to right and from top to bottom that it can be difficult to imagine writing any other way. Yet varying your formatting can be a source of inspiration, providing another element of visual interest for your journal. Turn your notebook sideways. Carry sentences across two pages. Experiment with different fonts. Vary font size. Box important details or words with different color inks. The sky’s the limit when it comes to creativity! You’d be surprised how quickly your creativity begins to flow once you give yourself permission to experiment. Before long, you’ll find yourself looking forward to journaling for the creative outlet it provides.
Experiment with different colors, fonts, and font sizes. Strive for visually dynamic pages.
6. Collect and add ephemera.
As in scrapbooking, ephemera can serve as a 3-D layer in your journal, providing visual interest and capturing the local flavor of your destination. Ephemera can also serve as a stand-alone journal entry should you find yourself too busy to write. We save every restaurant receipt on vacation and tape/glue them in our journals. Without needing to write a word, these receipts help us to remember specific restaurants and meals. We collect ink stamps from every National Park–not just in our National Parks Passport, but also in our individual journals. They’re free, unique, and readily available for the taking; the only thing required is a stop at the Visitor Center, which is always on our to-do list anyway. Carrying a glue stick, double sided adhesive, or washi tape makes it quick and easy to adhere any tickets, receipts, or business cards you might collect. Keep an eye out for unique ephemera to spice up your journal. Local beer or wine bottle labels make great journal mementos!
7. Strive to maintain your journal regularly.
It can seem impossible to find time to update your journal unless you plan to block out regular blocks of time for journal writing. We try to reserve 30-40 minutes at the end of each night for this express purpose, but things don’t always work out that way. Oftentimes, we’re too tired, or camp chores take longer than anticipated. We’ve learned the hard way to stay flexible by maximizing small blocks of downtime during the day for journaling.
Short entry drawn/written at Dream Lake, Rocky Mountain National Park during a hike to Emerald Lake.
Jotting down a few words at lunch and breakfast like this gives you a head start on the day. It also helps preserve the sense of immediacy and rawness in your observations that makes travel journals so precious. Shorter bursts can be just as effective as–and in many cases, more effective than–one long session. Because shorter bursts are generally more doable, you might find yourself in a better position to maintain your journal on a regular basis. And if you miss a night or two? Don’t sweat it! Just hop back on that wagon and pick up where you left off. Aim for regular, not perfect, and you just might find that keeping a travel journal is a habit that sticks for life.
Our road trip is two weeks away, and we’ve been having fun testing out new gear on recent hikes. I can (and have!) spent hours scouring REI and Backcountry, marveling over the countless backpacking/camping gadgets for sale, dreaming of all the possibilities. In the end, though, reality (i.e.: that darned budget) dictates limiting actual purchases to what we really need as a family instead of those fun-to-dream-about wants.
With only 3 backpacking packs in our possession, backpacks topped our list of needs this year. Luckily, there was an REI Anniversary Sale and member dividend that was burning a hole in my pocket to save the day! We were able to score an unbelievable deal on a 2015 Osprey Kyte 46 and REI Passage 38.
Osprey Kyte 46, jacket in the front mesh panel, separate sleeping bag compartment with integrated rain fly just above.
I’m not big on brand name items, but I couldn’t ignore the Kyte’s glowing reviews–or Osprey’s stellar lifetime guarantee. And call me shallow, but I adore that beautiful teal! One of the features I like best about the Kyte 46 is the external hydration sleeve. It can be a hassle to load/unload a hydration bladder from a filled pack, and this back access compartment eliminates that problem. The hip belt and load lifter straps are so smooth and easy to adjust with the pack on–one of many areas where Osprey’s commitment to quality is very evident. The fully adjustable harness and LightWire Frame technology ensures a custom fit and comfortable carrying experience. I love the roomy hip belt pockets that allow easy access to snacks and a cell phone, and the multi-zippered brain compartment that enables easy organization of frequent-use items.
Spacious zippered side pockets–each pocket can accommodate a sleeping pad, fleece pullover, and backpacking pillow.
The front mesh panel stretches to accommodate a rain jacket, and the side mesh panels can easily accommodate a Nalgene bottle each as well. The zippered vertical side pockets might be one of the Kyte’s best features. What the main compartment may lack in size is more than made up for by these spacious side pockets. I’ve stuffed a sleeping pad, pillow, and adult-sized fleece pullover into ONE pocket, with room to spare. There is also a sturdy shoulder loop for quick and easy trekking pole storage/access.
Roomy hip belt pockets, external hydration sleeve, stow-and-go trekking pole loop, multi-zippered brain compartment; Osprey Kyte 46.
With an integrated rain fly and separate-access sleeping bag compartment with floating divider, the Osprey Kyte 46 is perfect for overnight or 2-3 day backpacking trips. It can also be easily compressed and cinched for longer day hikes, making this a pack we’re sure to put to great use for many years to come.
With two girls in our family, we’ve had our share of unpleasant hiking bathroom experiences. Without going into too much detail, let me just assure you that the pStyle is a GAME. CHANGER. If you are female and you enjoy spending time outdoors, you need a pStyle. To be fair, there are cheaper silicone versions of the pStyle that I have not tried, but reviews on Amazon suggest that these imitations are less predictable, leaving room for error–definitely not a good thing (or look–shudder!) when you’re backpacking with only one pair of pants. The pStyle, however, is discreet, fail-proof, light, and compact, earning its spot as a must-have item in our backpacks this year.
With 8 nights of backpacking on the itinerary , compact cookware and mess kits were high on our list of priorities. Combining every Walmart gift card we’ve received over the past few years, we were able to nab this GSI Outdoor Pinnacle Camper cook set absolutely free! At 3 pounds 11 ounces, it’s not the lightest kitchen set-up for backpacking, but since the weight accounts for cookware and mess kits for 5 people, it works perfectly for us. One of the features I love best about this kit is how everything nests into one compact 9 inch by 5 inch package, making it suitable for flying, too, where space is at a premium.
GSI Outdoors Pinnacle Camper cook set; everything nests in this compact 9″ x 5″ matryoshka-like system.
With a 9 inch frypan, 3 L pot, 2 L pot, and 2 strainer lids, the non-stick hard anodized cookware easily accommodates families or larger groups. The set comes equipped with 4 plates, 4 insulated mugs, and 4 bowls, and everything nests into a stuff sack that doubles as a welded sink in the backcountry!
Full-size cookware (3 L & 2 L pots w/ strainer lids, 9″ frypan), plates, insulated mugs, and bowls for 4, welded sink carrying case.
If I had any complaints, it would be that the plates are not especially deep or made of high quality material, but that’s minor in the grand scheme of things. I love having full-sized pots and pans with backpacking convenience and integrated mess kits in the GSI Outdoors Pinnacle Camper cook set.
To complete our mess kit (the GSI cook set serves 4), we cashed in a Sports Authority gift card and took advantage of a 30% off closing sale to nab this Light My Fire MealKit 2.0 for free! With 3 plate/bowls and 3 lids that can double as eating vessels, this kit contains more bells and whistles than we’ll need, but it’s great to have those options for future trips. The MealKit 2.0 also comes with a spork, pack-up-cup, and cutting board/strainer for cooking.
Closer to Home: Recent Hikes
Makapu’u Lighthouse Trail
Makapu’u Lighthouse Trail is a popular and easy 2 mile “hike” along paved road, offering stunning views of Oahu’s southeastern and Windward coasts. From the parking lot, the paved road steadily climbs 500 feet, allowing easy access for strollers, wheelchairs, and those with mobility issues.
Paved road along Makapu’u Lighthouse TrailLooking back from whence we came: parking lot in the distanceKoko Crater and Ka Iwi Scenic Shoreline
Recent additions of rest benches and viewing areas make this a great beginner hike, and there is no spot more beautiful than Makapu’u for whale watching during whale season (November to May). Although the lighthouse itself is not accessible to visitors, we’ve been lucky to see dozens of whale spouts and breaches during whale season here. Located on the eastern side of Oahu, this hot and dry trail is also a prime location to watch the sun rise. The only con to this hike is that its popularity translates to large crowds; arriving after 10 am means circling for parking and sharing the trail with a hundred or more hikers. Don’t let that stop you, though–this hike is a beauty, and despite the crowds, we do this one at least 5-6 times a year!
View from the top, Makapu’u Lighthouse TrailView of Rabbit Island, aka Manana (State Seabird Sanctuary); I don’t recommend sitting that close to the edge!A patch of pink among the cacti and brush; pillbox in the distance3 short years ago…boy, time flies!
Kuliouou Ridge Trail
Kuliouou Ridge Trail is a 5 mile out and back hike that ascends 2,000 feet to summit the Ko’olaus. Families should plan on spending 4-5 hours hiking this trail at a moderate pace. Although this is a moderately difficult hike composed primarily of switchbacks, rain can render the steep slopes muddy and challenging.
Slippery, muddy stairs about 15 minutes from the top, Kuliouou Ridge Trail
Exercise extreme caution, especially with children. With all the recent bad weather, we had a few near-mishaps this past weekend. There are several long and steep rock/tree root scrambles in the second half that can become quite treacherous when coupled with mud. (No pics, unfortunately; was too busy trying not to die!) I should have known better than to push this hike in the rain, and we nearly paid the price for it. It is worth your family’s safety to wait for several days of clear weather before attempting this hike. That said, this hike is an absolute must-do! We huffed and puffed through the 2,000 feet of elevation gain, and the last 30 minutes of steep mud puddle stairs were thigh burners, but hiking in the clouds made everything worthwhile. Unfortunately, the bad weather didn’t make for great views.
End of Trail, Kuliouou Ridge TrailClouds and fog at trail’s end, Kuliouou
However, the fog and clouds lifted for a brief minute, and we were able to get a glimpse of the glorious views Kuliouou is known for.
View of Waimanalo, Kuliouou Ridge TrailView of Koko Head and Hawaii KaiGlimpses of green and turquoise below, WaimanaloStopping for well-earned spam musubi and gummy bears at trail’s end.
Having hiked Kuliouou during clear weather, I can tell you that the views of Hawaii Kai, Waimanalo, and Lanikai from the top can’t be beat. If you’re looking for a challenging workout, ever-changing scenery, and stellar views, Kuliouou Ridge Trail is the hike for you!
Summer’s here! The blog has been quiet as of late, but with school and the kids’ extracurriculars finally behind us, we’ve been focused on prepping for our Glacier/North Cascades/Olympic trip (we leave in three weeks!). Maps are being compiled; lists are being checked twice. With the bulk of our itinerary leaning toward backpacking this year, it’s also crunch time for conditioning. This weekend’s fun and easy training hike was Lanikai Pillboxes.
Lanikai is renowned for its beautiful beaches.
Sunrise, Lanikai Beach 2013
Media outlets like CNN have named it the most beautiful beach in the US, and though I haven’t traveled enough to say for sure, I can certainly vouch for Lanikai’s beauty. Located on the eastern side of Oahu, Lanikai’s fine powdery sand and pristine turquoise waters make it one of the best sunrise spots on the island. But Lankai has another great attraction that I love as much or even more than the beach: the Lanikai Pillboxes hike, a.k.a. Kaiwa Ridge Trail.
This 1.6 mile out and back hike begins across the Mid Pacific Country Club near a private driveway on Kaelepulu Drive.
Beginning of the trail, Lanikai Pillboxes
The trail begins with a steep incline; there are trees and ropes along the chain link fence to assist with the climb, though they’re probably not necessary for most. Sadly, litter and pet waste makes this area less than appealing, but not to worry–better sights and smells await.
Hold your nose and climb fast, Lanikai PillboxesThe beginning of the trail is a little steep, Lanikai Pillboxes
After a short climb, you arrive at a plateau that overlooks Lanikai Beach and the Mokulua Islands just offshore. Behind you are sweeping views of Mokapu Peninsula (Marine Corps Base of Hawaii), Flat Island, and Kailua Beach.
Lanikai Beach and Mokulua IslandsMCBH, Flat Island, Kailua Beach
From here, you can visualize the first pillbox in the distance and the rocky trail that follows the ridgeline to get you there. The trail gains over 550 feet in under half a mile, but the short distance makes the steepness doable for families with young children. With a little persistence, it’s possible to make it to the first pillbox in 20 minutes, and there are many places to stop and catch your breath along the way.
The 1st pillbox is that black speck at the top/center of the photoLooking back
The trail diverges in several spots–traversing the top of the ridge and contouring it in other areas–but rest assured that all spur trails lead to the same destination.
Follow the ridgeline to get to the first pillbox (far left)
Along the ridge, overlooking MCBH
Once you arrive at the first bunker, take a moment to admire the view. We were there just before sunset, and there were several groups situated atop and inside the pillboxes, waiting for the sun to go down.
View from the first pillbox, Lanikai
Early morning hikers often find themselves vying for space here as it’s a popular spot for sunrise photography as well. As documented in my Bryce horseback debacle, I’m not keen on heights and ledges, so I opted to stay firmly on the trail here. 🙂 The boys, however, climbed atop the pillbox with my husband.
The first pillbox. The boys climbed up here and made mom verrrry nervous.View from the ground, first pillbox, Kaiwa Ridge Trail
Many hikers opt to turn around here, but a short 5 minute walk further up the ridge takes you to the second pillbox–and a breathtaking view of the Ko’olau Mountain Range in all its verdant, crenulated glory.
View of the Ko’olaus and Mokulua Islands (photo credit to the hubby)View from the second pillbox, LanikaiLanikai neighborhood as seen from Kaiwa Ridge Trail
From here, you can follow the undulating ridge for another 20-30 minute; the trail eventually descends into a neighborhood about a half mile from the trailhead, but we opted to retrace our steps instead. The sun was just beginning to set, and we were treated to cool tradewinds and an entire hillside of night-blooming cereus readying for evening bloom. Night-blooming cereus is a tropical cactus flower that blooms in the evening and wilts by dawn.
Night-blooming cereus, Lanikai Pillboxes (photo cred to the hubby)
All in all, this short and sweet hike is one that I would highly recommend. It packs mega scenery for minimal sweat, showcasing stunning Windward views of the island. Tell me: have you hiked Lanikai Pillboxes? What’s your favorite Hawaii sunrise or sunset spot?
Tips for families hiking Lanikai Pillboxes with young children:
Plan to hike on weekdays, if possible
The trail can get crowded, especially on the weekends. We finished the trail fairly late (6:30 pm), and there were still large groups of ten or more arriving to hike as we left. Weekdays are less busy and tend to be more pleasant.
Use the bathroom beforehand
There are no bathrooms at the trailhead, so plan accordingly. The nearest public restroon is located at Kailua Beach Park, 5 minutes away.
No parking near the trailhead
No parallel parking is allowed alongside the Mid Pacific Country Club. Your best bet is to park in the surrounding neighborhood, but be advised that parking can be difficult to find because of the new restriction against parking in the bicycle lane. Resist the temptation to park illegally–parking in a restricted area will result in an outrageous $200 flat fine! Instead, circle the Lanikai loop patiently–you’re sure to find something quickly, as visitors are always arriving and departing from the beach.
Apply sunscreen and avoid hiking midday
The Hawaii sun can be brutal if you’re not properly prepared, especially on an exposed ridge hike like this one. Good sun safety makes for a pleasant and comfortable hike.
Wear proper hiking shoes
Many tourists attempt this hike in flip flops and sandals. I’m sure it can be done, but as the trail is mostly slippery rock and gravel, shoes with proper traction are key.
Avoid hiking during or after rain
Again, the trail is steep and challenging in certain areas. Mud and wet rock only exacerbates these difficulties and makes for a sketchy hike. We saw two adults slip and fall this weekend, and the trail was bone dry. Keep little ones safe, and be sure to limit hiking to good weather.
Sunset, Lanikai Pillboxes last yearSunset, Kaiwa Ridge trail
Although I currently call Honolulu home, I was actually raised on the Big Island of Hawaii, in the sleepy little town of Hilo. Growing up, Hawaii Volcanoes National Park wasn’t something I gave much thought to; it was just someplace in our backyard that I could count on visiting several times a year. It’s only now, as an adult, that I’ve come to appreciate the unique wonder of Hawaii Volcanoes National Park. If witnessing one of the world’s only active volcanoes isn’t reason enough to convince you to visit this summer, here are 7 other reasons that just might change your mind:
1. Thurston Lava Tube
Entrance, Thurston Lava Tube
Where else in the world can you walk through a massive 500-year-old lava tube? Lava tubes are formed when flowing lava rushes beneath the surface of a previously hardened lava flow. Thurston Lava Tube trail begins in a lush tree fern forest and winds through a dark and damp lava tube illuminated by lanterns. Inside the tube, the ground is flat and level, but cool water seeps from the ceiling and collects in muddy pools along the floor, adding to the eeriness of the experience. While there are other lava tubes and caves on the Big Island, Thurston is the most easily accessible (and safest) by far.
Tree Fern Forest, Thurston Lava TubeThurston Lava Tube
2. Devastation Trail
This 1.6 mile roundtrip trail takes you through a stark expanse of rugged beauty–the remains of a 1959 eruption of Kilauea Iki that left the area buried in cinder. Lone trees and barren stumps stand solemn against reddish-brown cinder mounds, evoking an eerie sense of otherworldliness. Perhaps what is most poignant about this path, though, is not the destruction that is so readily evident but the resurgence of plant life and native birds that serve as testament to the power of life.
Devastation TrailSigns of life; Devastation TrailSigns of life; the return of ohia lehua
3. Kipukapuaulu (Bird Park) Trail
This easy 1.2 mile loop flies under the radar of most guidebooks and visitors, but it’s one of our favorites. For as many times as we’ve walked this loop, we’ve never run into more than one or two people on the trail. Our oldest son is a birder, and Kipukapuaulu is one of the best places we know of to spot native (and endangered) Hawaiian bird species. Take a stroll through the lush forest–those with patience will reap the reward of hearing beautiful apapane and iiwi birdsong. Binoculars and a keen eye will help bring these delicate and brilliantly colored songsters into focus. And as tempting as it might be to keep your eyes peeled to the treetops, there are also francolins and pheasants to be admired in the shrubs.
Kipukapuaulu Loop, Hawaii Volcanoes National ParkStop and listen, KipukapuauluBird Park, Hawaii Volcanoes National Park
4. Holei Sea Arch
Located at the very end of Chain of Craters Road, Holei Sea Arch stands 90 feet tall, formed only within the last several hundred years by the powerful forces of lava and water. Everything about standing at the overlook makes you acutely aware of how small and insignificant we are. Here, the ocean crashes against the lava cliffs, reminding us of its power to both give life and destroy. The ancient lava cliffs represent a similar dichotomy: even as lava destroys everything in its path, it flows steadily to the sea, creating new land–and new life. Above all, Holei Sea Arch serves to remind us of life’s transience. It is a temporary formation–beautiful, yet fleeting.
Holei Sea Arch, Hawaii Volcanoes National ParkPower of the ocean at Holei Sea Arch
5. Pu’u Loa Petroglyphs Trail
Also located on Chain of Craters Road, this 1.4 mile easy to moderate hike takes you over a field of pahoehoe (smooth) lava to a boardwalk that straddles some of the best-preserved petroglyphs in the state. Pu’u Loa is considered a sacred site. While it is believed that the ancient Hawaiians used these petroglyphs to record their travels and history, Pu’u Loa is believed to be sacred because it also served as a burial site for umbilical cords after childbirth. This practice carried deep spiritual significance and ensured long life.
Pu’u Loa PetroglyphsBoardwalk, Pu’u Loa Petroglyphs Trail
Walking the wooden boardwalk is fascinating, but getting there can be a challenge for those with mobility issues. Crossing the hardened pahoehoe lava field translates to many small hills with uneven surfaces. Hiking shoes, or at the very least, tennis shoes are your best best; too many tourists attempt this hike in flip flops or sandals, which tend to get caught in lava crags. Pahoehoe might be smooth, but it is still lava rock, and it will definitely hurt if you fall! The uneven terrain also means this hike might take longer than you’d expect; it’s always a good idea to bring water with you.
Crossing a pahoehoe field, Pu’u Loa Petroglyphs Trail
6. Crater Rim Trail
This 11-mile trail follows the circumference of Kilauea’s summit caldera. The beauty of this hike is that it can be easily accessed from several locations along Crater Rim Drive, allowing you to hike as little or as much as you’d like. One of our favorite portions of Crater Rim Trail is the Steam Vents and Sulphur Banks area. With all of the surrounding forest area, it can sometimes be easy to forget you’re at an active volcano. The Steam Vents and Sulphur Banks let you know in no uncertain terms that the land is indeed alive. Those who have visited Yellowstone will be familiar with the inimitable smell of sulphur; it’s an odor kids love to hate. No matter how many times the kids gag their way through this trail, they always ask to stop at the Sulphur Banks whenever we visit.
Hmm, what’s that rotting egg smell?Sulphur Banks, Crater Rim Trail
A word of caution: those with asthma or breathing issues will want to steer clear of this area. Gases and vog (volcanic dust and gases) are present throughout the park (and throughout the Big Island, occasionally spilling over to the other islands), but are especially thick in this area.
Overlooking the caldera, Crater Rim TrailStark beauty along the Crater Rim TrailSteam Vents, Crater Rim Trail
7. Halema’uma’u Crater
Located within Kilauea’s summit caldera, Halema’uma’u Crater is home to some of the best volcanic fumes and glow to be seen within Hawaii Volcanoes National Park. Best of all, you don’t even need to traverse any sketchy lava fields to be able to see this awesome display. Simply head up to Jaggar Museum to snag your spot along the rock wall at sunset and prepare to be dazzled. The last time we went, we found ourselves jockeying for position with several bus-fulls of tourists. Shouts in Japanese, Cantonese, and Italian could be heard across the museum as each group competed to be heard over the noisy din. We didn’t hold out much hope for a meditative night-viewing experience, but the moment the sun started to set, it was as though a sacred and collective hush fell over the group. Shouts faded to whispers as everyone stood in silence, sharing the powerful sight before us. It reminded me once again of how the National Parks have a way of dissolving barriers and uniting us in wonder.
Sunset, Halema’uma’u CraterFumes and Glow, Halema’uma’uHalema’uma’u Crater, Hawaii Volcanoes National Park
Hawaii Volcanoes National Park has so much more to offer than first meets the eye. Whether you’re seeking the spectacular wow-factor of a lava night show or the quiet solitude of a stroll through Bird Park, Hawaii Volcanoes National Park is sure to delight you and your family!
Tell me: When was the last time you visited Hawaii Volcanoes National Park? What was your favorite Big Island experience?